Windows 11 and the Virt-Manager logo are registered trademarks owned by their respective copyright holders and is only used in this article for informative purposes
Making and optimising a Windows 11 VM for gaming (2026)
Let me preface this article by saying that I've seen guides for this in quite a few places but I still feel the need to document them as none of them replicate all the exact steps I follow (Usually skipping things like installing the virtio drivers hard drive or fixing the clock). The most complete guide I've seen is by Bryan Steiner on github and even then there are a couple of issues with his approach that I disagree with such as using hooks and using a whole volume instead of a disk image or LVM.
I am therefore making this guide more to myself than anyone else, I'm fairly certain I missed a couple of things but I get a good balance of security and performance doing that I'm rather happy with and have used for over two years now (My main PC notes the installation date as April 1st 2024).
Step 0. Things to know before-hand
First of all before you jump right in there are a couple of things to consider, what you have at hand and what you want to do regarding storage. Do you want security or performance? Here are the basic pointers.
What you'll need:
A computer with two GPU's (One of them can be an igpu), both of them with a video output. I heavily recommend you use an Nvidia card for the card you're intending to passthrough (See addendum 2).
A Motherboard that actually supports IOMMU without major issues (See step 1)
An EDID Dummy plug (See addendum 1).
Select your approach regarding storage:
Disk image (Qcow2, img, etc): Slowest speed (Although admittedly not that much compared to using an LVM) but the most portable, effectively you can backup your whole windows system in an external hard drive and replicate it several times. You could toss your entire computer out and still continue to be able to replicate your VM endlessly as long as you have the image really. I recommend this one if you're more concerned with security and availability than performance
LVM (This guide): The in-between middle-of-the-road fence-sitting approach, you can take external snaps, can take the disk out of a system place it on a new system, load the LVM as a VM on the new system and keep going. I recommend it if you're looking for a balance between security and performance as the disk doesn't touch your host system.
Disk passthrough: The best performance but honestly you lose all portability and snaps plus some security as the disk is in direct contact with the hardware and if you watch ransomeware or something on windows it can easily be game over, I wouldn't do this one unless I was using a laptop. use this one if you're preoccupied only with performance and just want to be able to dual boot Linux and windows.
As stated above I'm going with the LVM approach but honestly it doesn't make that much of a difference in regards to setup. I'm also not doing a method known as 'hooks' for this guide (See addendum 2) if you want to do hooks check out Bryan Steiner's guide on Github.
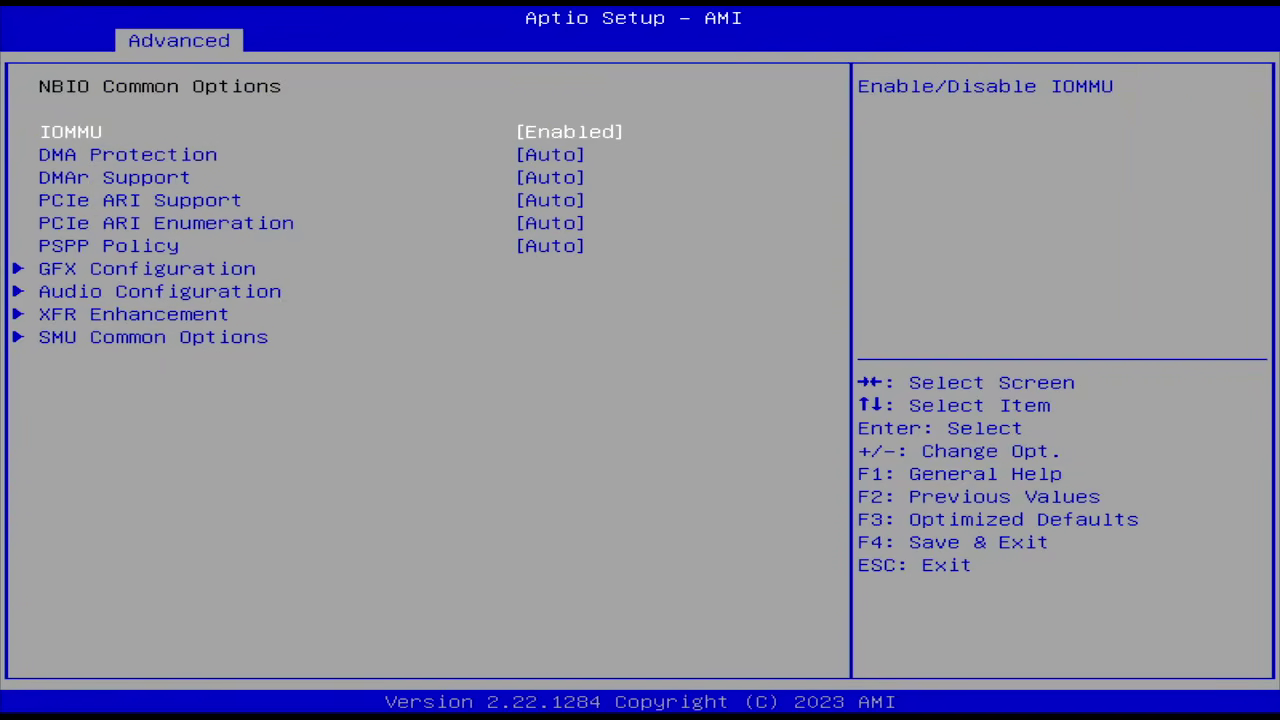
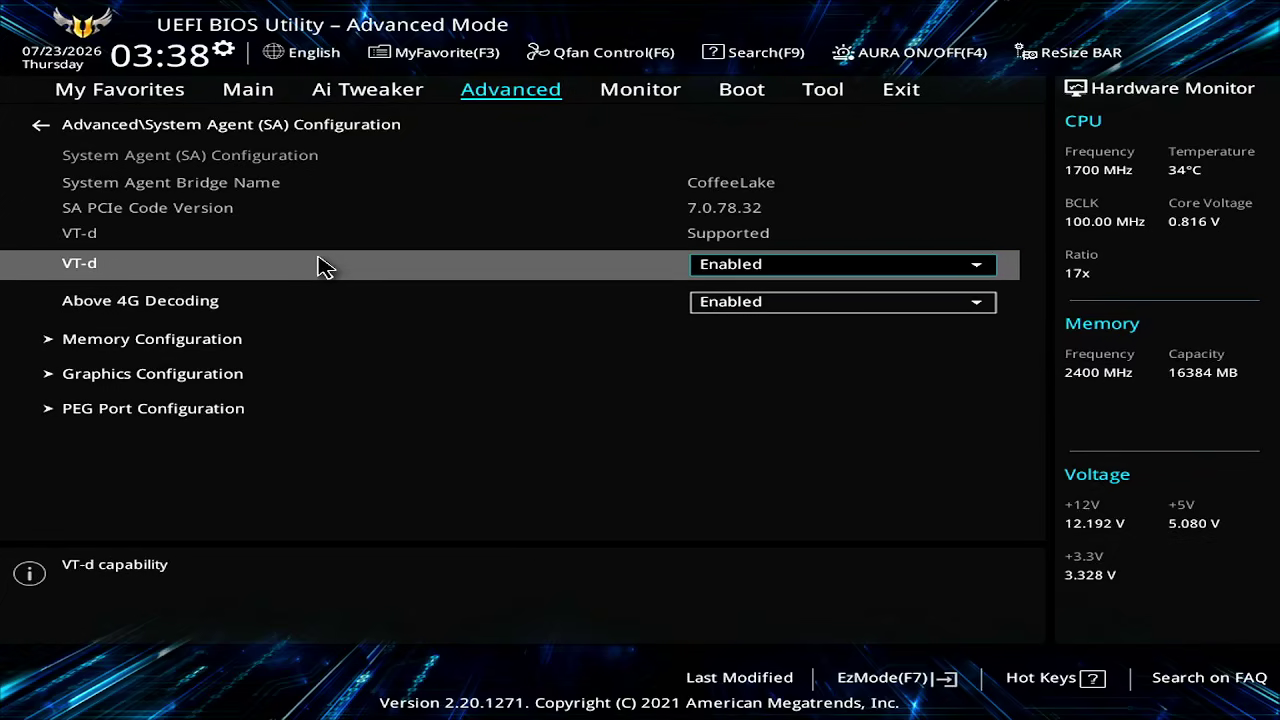
Finally you need to ensure your motherboard supports IOMMU and enable IOMMU in the bios, most modern motherboards support this but depending on your model you may have to look for it under advanced PCI or advanced CPU settings. It's usually labeled as 'intel VT-D' for intel motherboards and as AMD IOMMU for AMD motherboards, however the names aren't completely standardised and may vary, check your motherboard manual or support forum.
IOMMU on AMDIOMMU on intel
Step 1: Check the motherboard compatibility,
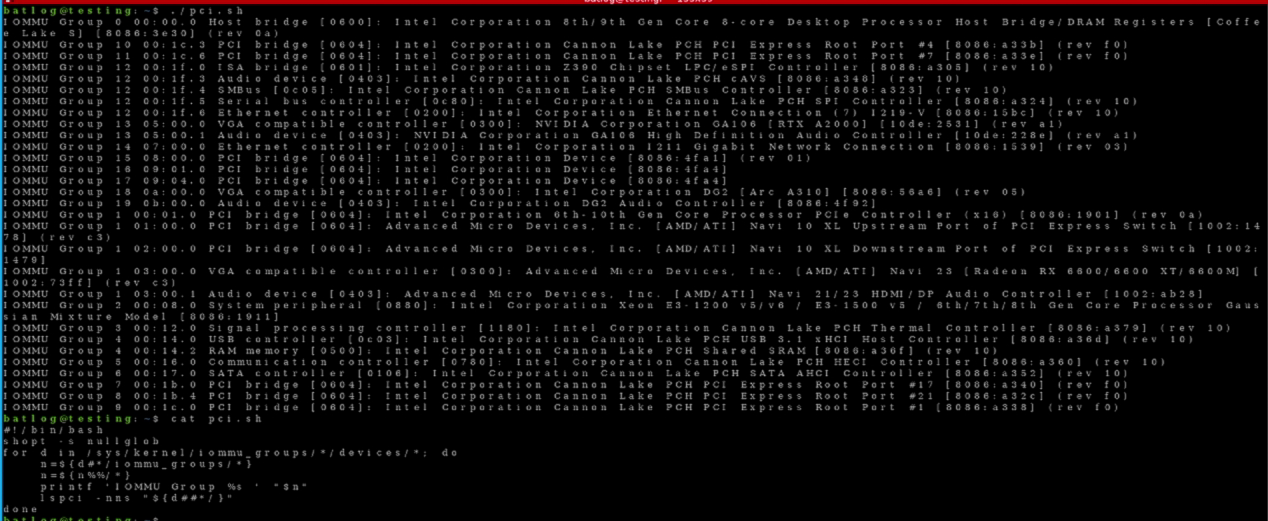
Assuming you already have a computer or can test it before buying it, you'll want to run the following bash script :
#!/bin/bash for d in $(find /sys/kernel/iommu_groups/ -type l | sort -n -k5 -t/); do n=${d#*/iommu_groups/*}; n=${n%%/*} printf 'IOMMU Group %s ' "$n" lspci -nns "${d##*/}" done;
(Script taken from flungo at github)
What this does is list the IOMMU groups of your PC, which allows you to check if there are any conflicts.
If the video card you're trying to pass through is not part of some other group (Eg your usb ports or your sound card or something else) Then you're in the green. Otherwise I don't recommend you follow up with this, there is a method around it by using a modified kernel called linux-vfio which can be found in the Arch AUR repository but honestly It's outside the scope of this article.
Step 2: Creating an LVM and making the windows virtual machine.
Before you can even begin installing you need an LVM to live in, it has to be completely unfatted and I recommend using a second drive as it makes it easier to handle if you have to re-install your host, change distros or something else of that nature (For the record this LVM can exist alongside your host if you made an OS install making use of LVM's and left some space left in your disk).
For this example I'm targeting the Volume group VGSSD created in the physical volume sdd1 (Previously formatted as an ext4). The exact commands I used it for create the LVM were:
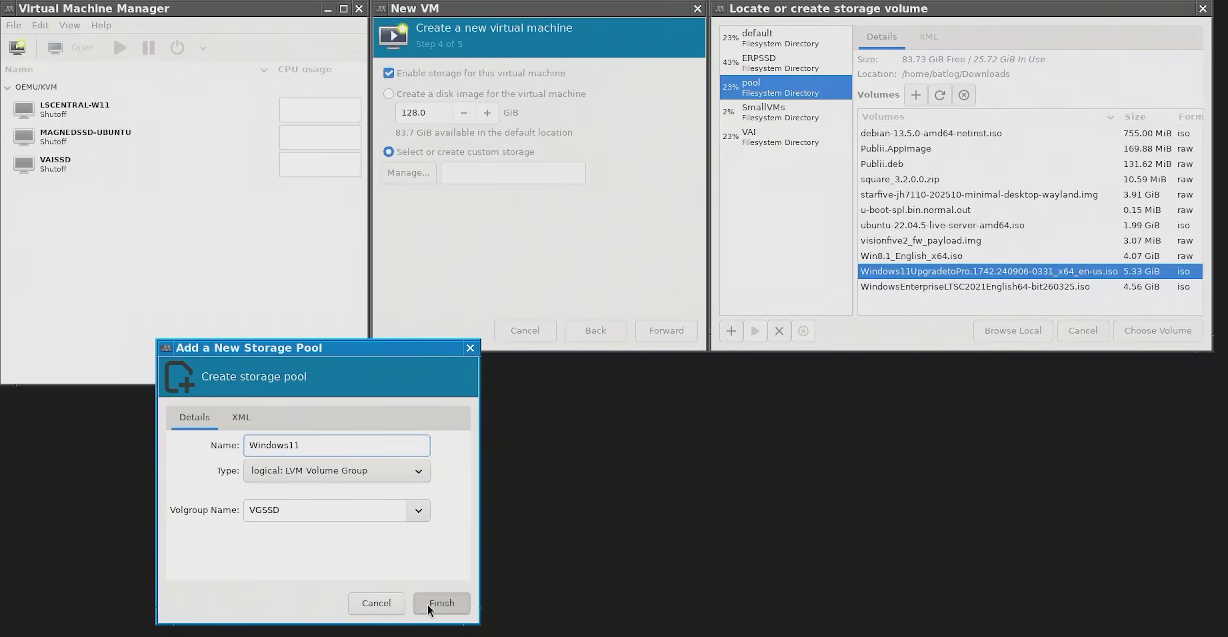
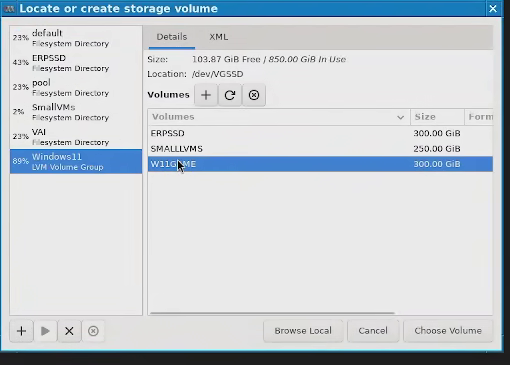
Now you can use virt manager and make a normal virtual machine but when prompted with picking a storage for it you have to select Volume group and then select the LVM you just made.
Adding the volume group to the storage poolsSelecting the Logical volume from the pool
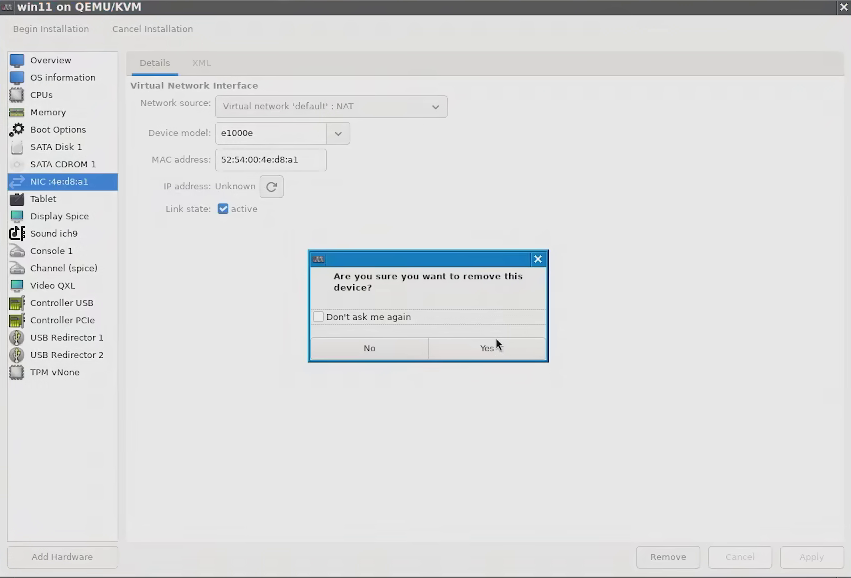
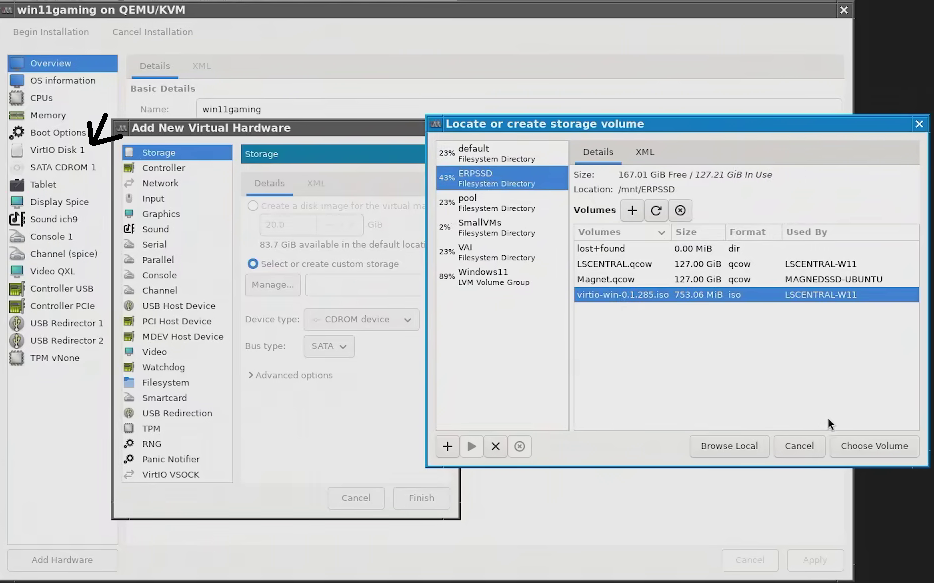
After you're done and everything looks good, before you begin the installation remove the network card, change the main storage device to virtio and add the virtio iso, then fire up the virtual machine.
Deleting the network CardInserting the Virtio guest tools disc before starting the install
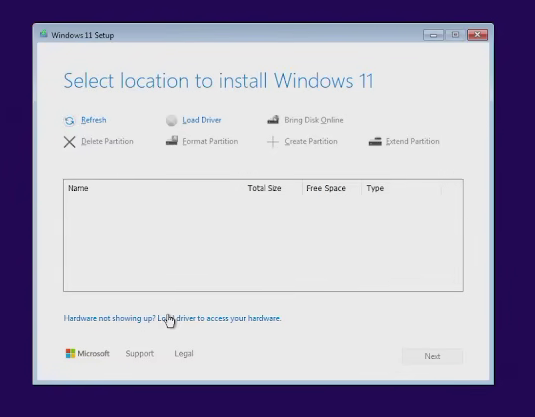
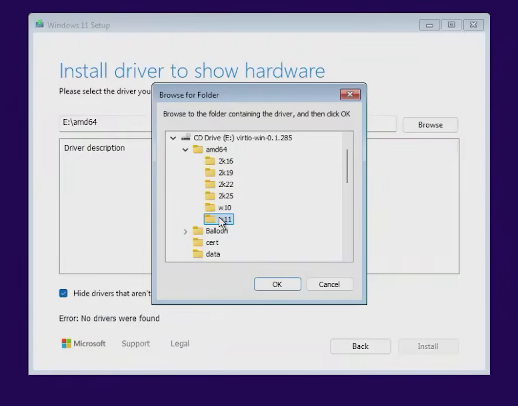
Follow the Windows 11 installation normally (DO NOT ENTER A LICENSE AT ANY POINT AS YOU'LL BE MAKING A LOT OF CHANGES TO THE HARDWARE AND WINDOWS WILL MAKE THE LICENSE INVALID, LOAD A LICENSE ONLY AFTER YOU'RE DONE DOING EVERYTHING) until you reach selecting a storage device, at that point the system will claim you don't have any. Select the option to load drivers and pick the disk drivers from the W11 folder on the virtio guest tools disc. After this the installation should proceed and complete normally.
Select manual driver loadingSelect the driver according to the windows version you're using
After the system reboots, proceed with the installation as normal.
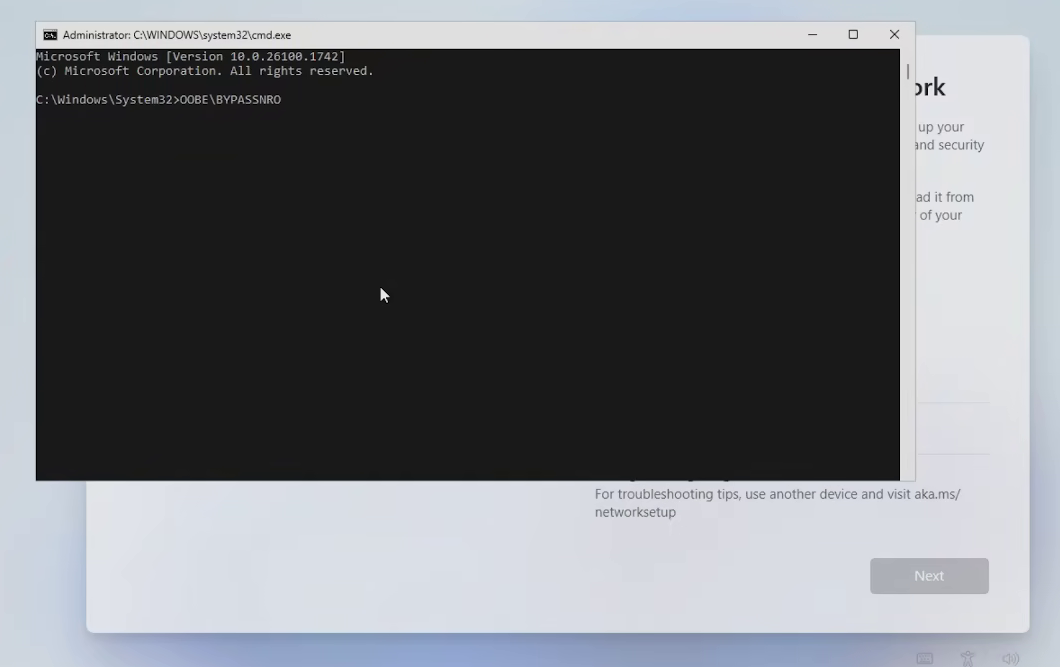
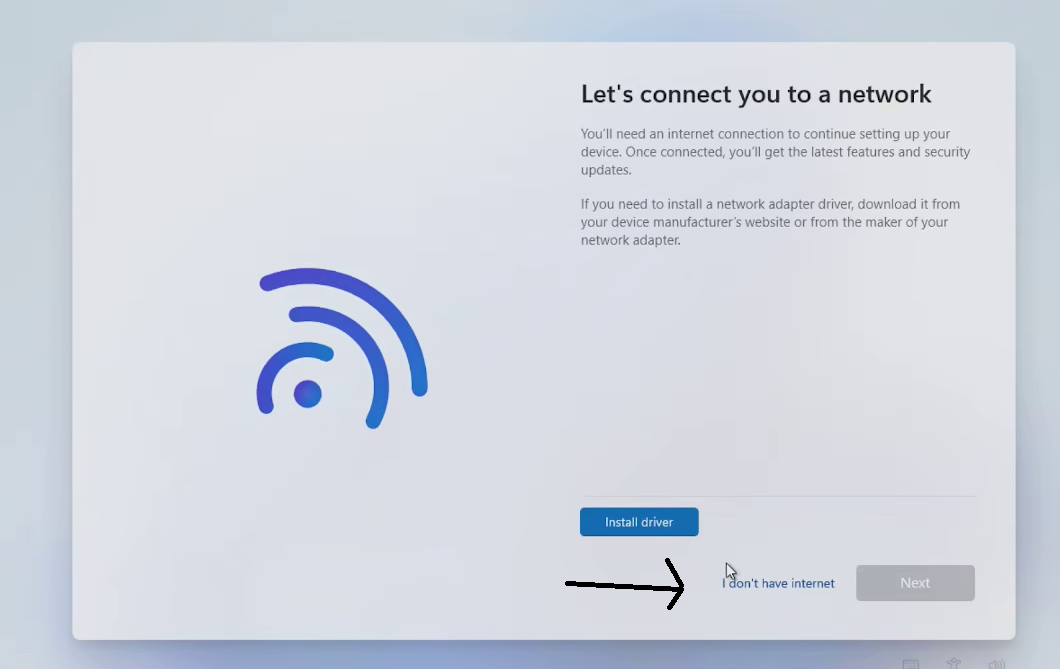
When windows asks you to connect press Shift + F10 , this will open a cmd window, enter OOBE\BYPASSNRO . This will reboot the virtual machine in a mode where you are no longer asked for a microsoft account and can setup a local account. I've heard from other people that the ability to open cmd during install was removed in later ISOs you download from Microsoft, so if you encounter this issue you may need to ask someone you trust for an old ISO try and avoid the wayback machine as I've encountered tampered discs there in the past.
Opening a DOS window during installThe system allows for an offline account after install
I heavily recommend using a local account by the way, there is a non-zero chance you'll encounter a piece of hardware that looking glass (A vital program for this guide) does not support and if that happens to you then you're toast and must use freeRDP, which is very easy to use with a local account but extremely annoying to work with using an online account. If you insist on having your data stolen by Microsoft at all times at least make sure to make a second account that works locally.
Step 3: Installing the virtio drivers and CPU Pinning
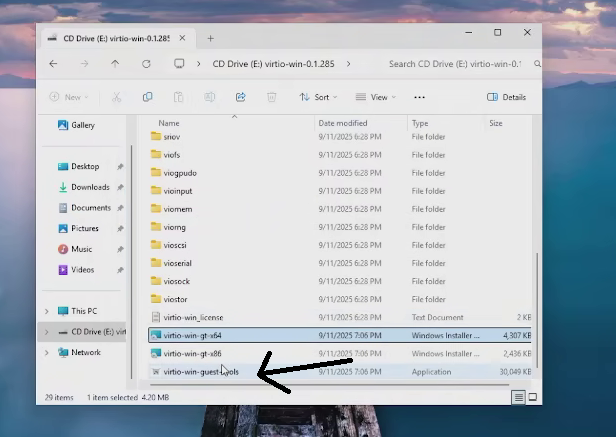
Once you're inside open the virtio guest tools disc and install all the virtio drivers. The process is very straight-forward and once you change your video output to virtio after a reboot you'll immediately notice your first performance boost.
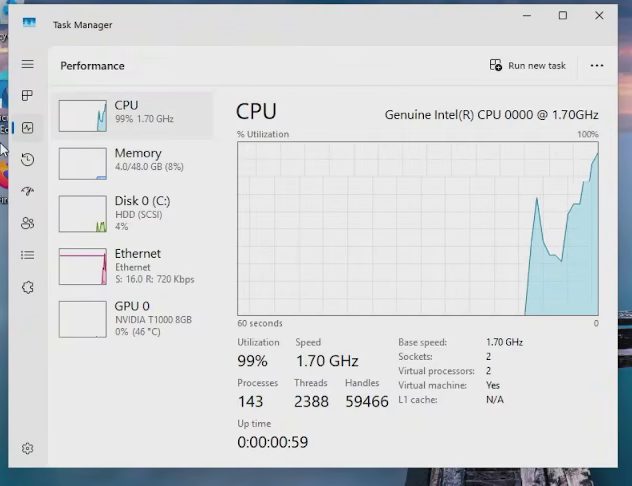
Chances are you'll encounter your first hurdle when you notice windows is only using 2 cores at all time.
This is such bull that has never been addressed or fixed in at least 4 versions of Windows
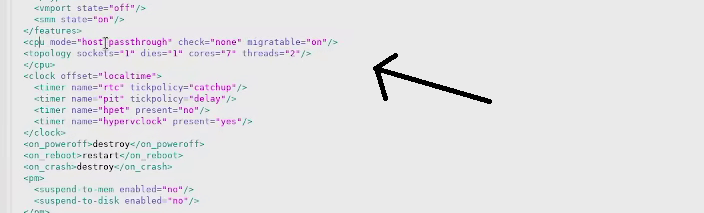
To solve this you must add the topology in the XML on virt manager under the cpu tag manually like this for 14 threads:
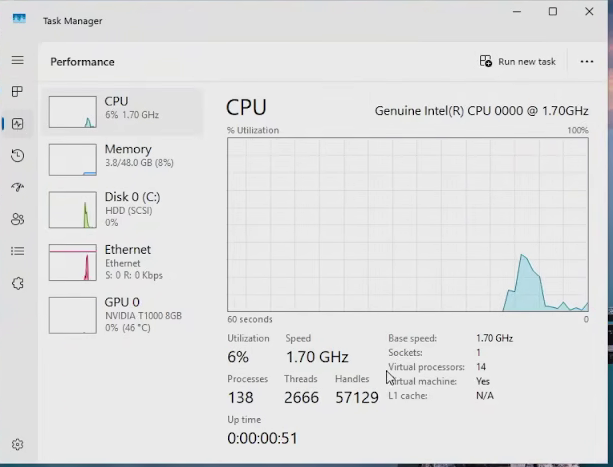
After a reboot it now does display the correct number of vCPU's
This will effectively bring you into 'workable' performance levels, if all you want is to run some program or use windows for office work then you can just stop here.
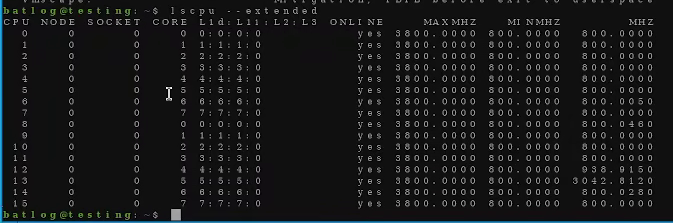
If you want to use the machine for gaming however, there are still quite a number of steps. FIrst you'll have to pin your CPU cores, list all your CPUs with lscpu -- extend (I do recommend using lscpu extend and not something else, don't bloat the host, you'll need the resources later on).
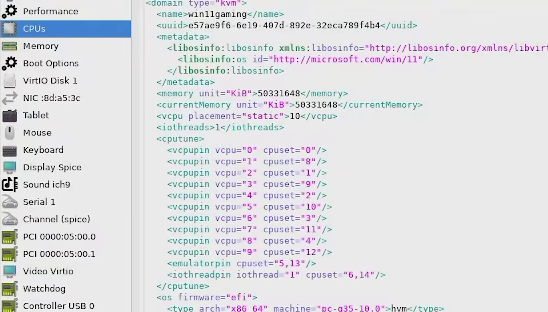
This tells you the exact order of your threads and which physical core they are attached to, which is important when pinning as you must pair the threads that belong to the same core (In my case for instance I must pair 0 with 8, 1 with 9, 2 with 10, etc.).
Now, as I only have 16 threads I'll be reducing the amount of vcpus on the virtual machine to 10 in a move that may seem rather counter-intuitive. The reason for this is because I want to keep two for my linux host, to threads for emulation pining and two for iothread pining. My config looks like this:
Now what do the threads I reserved and left out of the VM do?
emulatorpin handles tasks by the hypervisor rather than the virtual machine itself, basically it handles tasks that would normally be assigned to your virtual machine CPUs and isolates them so your virtual cpus can handle what's going on in the virtual machine itself.
iothreadpin: Handles storage and network management, depending on your setup I recommend allocating two full cores (4 threads) to this, poor disk speed in virtual machines is an issue I encounter very often.
If you boot your machine and the task manager says you're using the amount of threads you pinned down, then you're in the green and can finally move towards the next step.
Step 4: Passing through the Nvidia GPU and installing the Nvidia drivers
It is at this point you should add back the network card you deleted (Ensure it's using virtio drivers) but most importantly it's at this point you need to start working in passing the GPU to your windows guest.
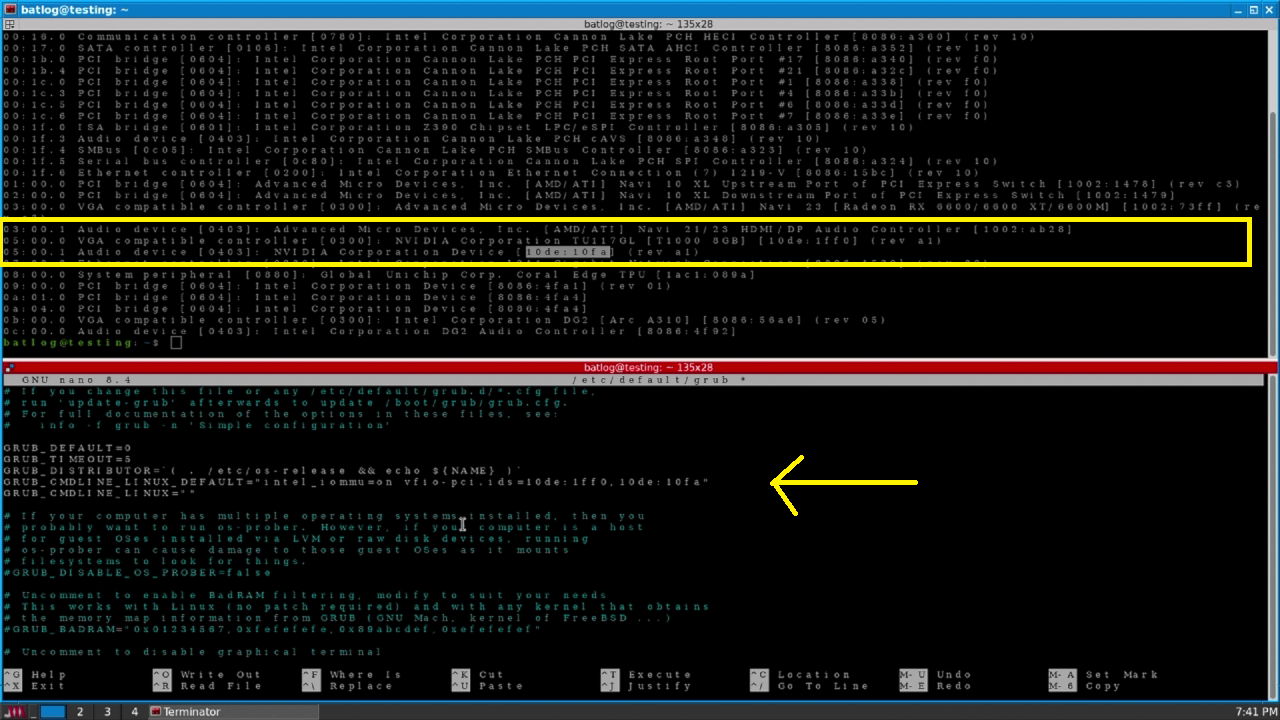
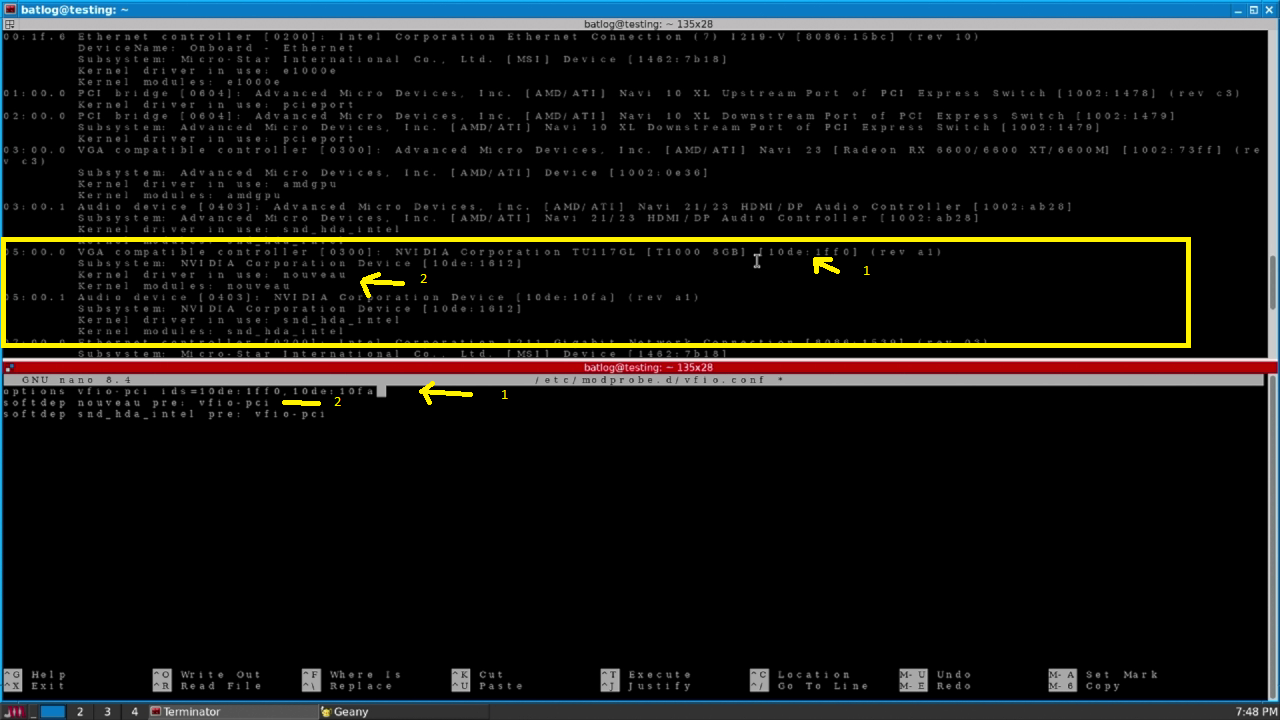
The process is rather simple, first identify your GPU with lspci -nn and write down ALL the devices IDs that share the same group as the GPU, In my case I only had to write two devices down, the graphics card itself and the sound card that comes with the GPU.
Then open edit /etc/default/grub with your favorite text editor (In my case nano) and under 'CMDLINE-LINUX-DEFAULT' add:
intel_iommu=on (Or amd_iommu=on if you're on an amd motherboard) and;
vfio-pci.ids=<the values you wrote down separated by commas>
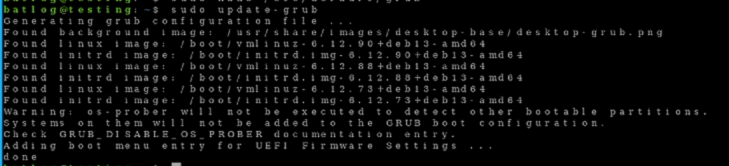
Afterwards update grub, if you get no errors you're in the clear
Afterwards, execute lspci -knn to check the driver currently loaded in the kernel for your graphics card and other devices. Then, create a new file on /etc/modprobe.d/virtio.conf and add to it:
options vfio-pci ids=<same device values you added on grub>
softdep <kernel module currently loaded> pre: vfio-pci (You must do this for all the devices individually)
Afterwards, upgrade your initramfs (Please note this command varies greatly from distro to distro). If you get no errors, you may be in the green.
Afterwards reboot your system and run lspci -knn if the command shows that your devices are using vfio-pci drivers then you're golden, if not go back and check that you configured the file in modprobe.d correctly (It's very sensitive to spaces).
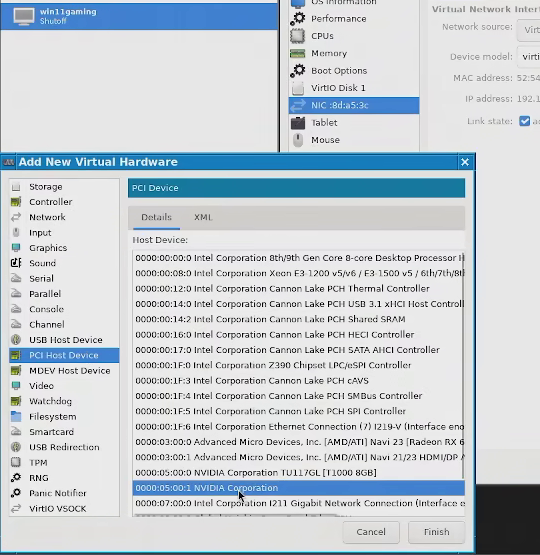
Attach the GPU and attached devices (In my case just the unlabelled sound card) to the virtual machine and fire it up.
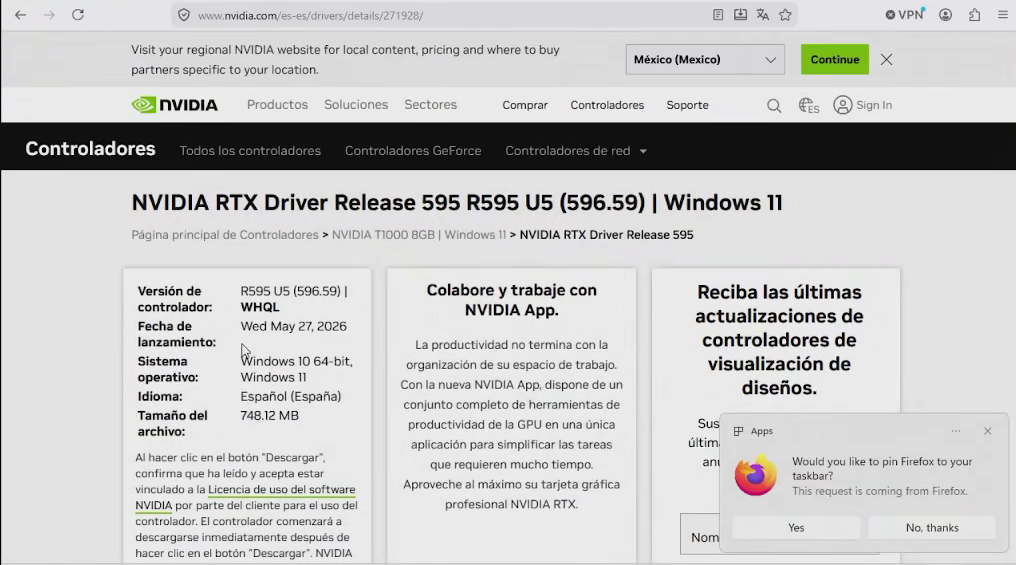
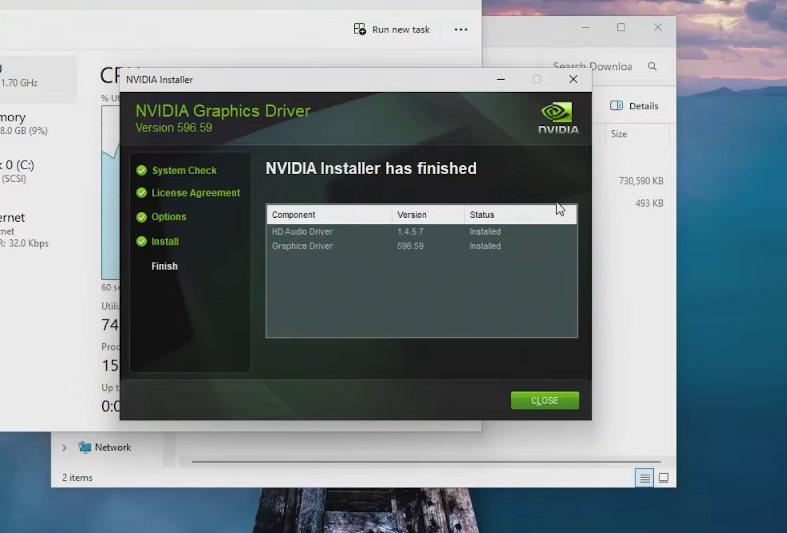
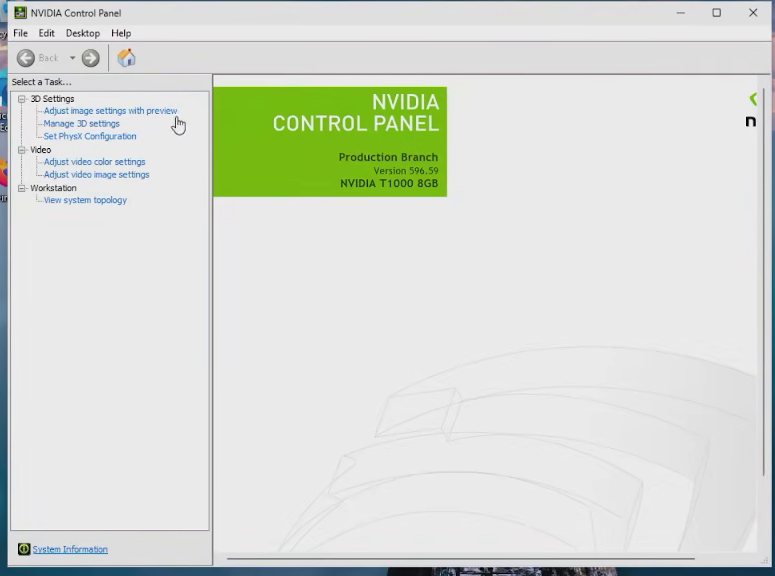
Once inside the virtual machine download the Nvidia drivers, install them and check the system is detecting the correct card using the Nvidia panel.
Downloading the driversInstalling the driversChecking the Drivers are running properly
If you reach this part you can pretty much use the card for anything related to cuda tasks (Handbreak, sfx, Ai, etc.) but gaming performance is piss-poor, this is because the display driver isn't actually being used as it doesn't have a screen attached, keep on reading on how to fix it.
Side note: On my main rig I also passthrough a wifi card that came with my motherboard because I have no use for it and honestly would rather avoid any windows shit on my Linux environment, including my virtual networks. I didn't include that in this article as the motherboard I'm using doesn't have a wireless card.
Step 5: Looking glass and Scream (Correcting Video and Sound)
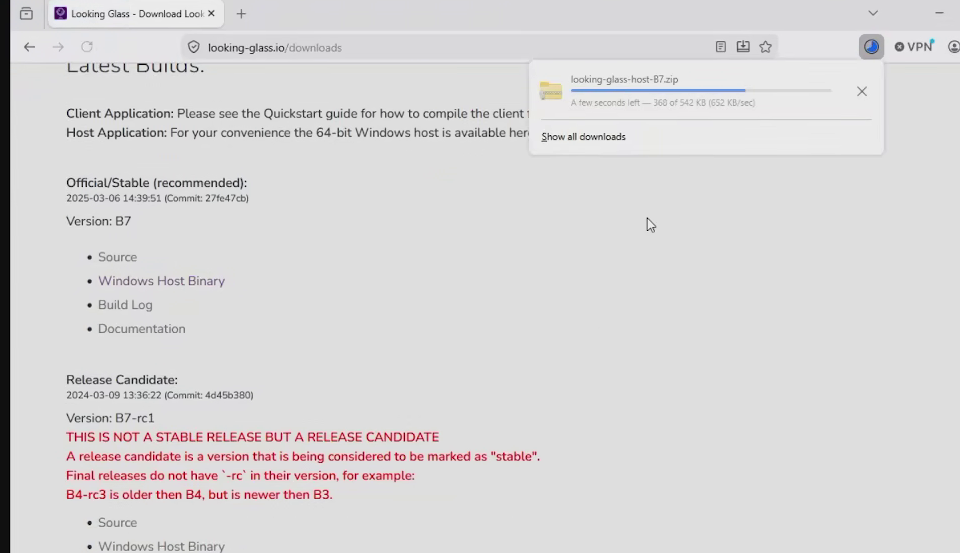
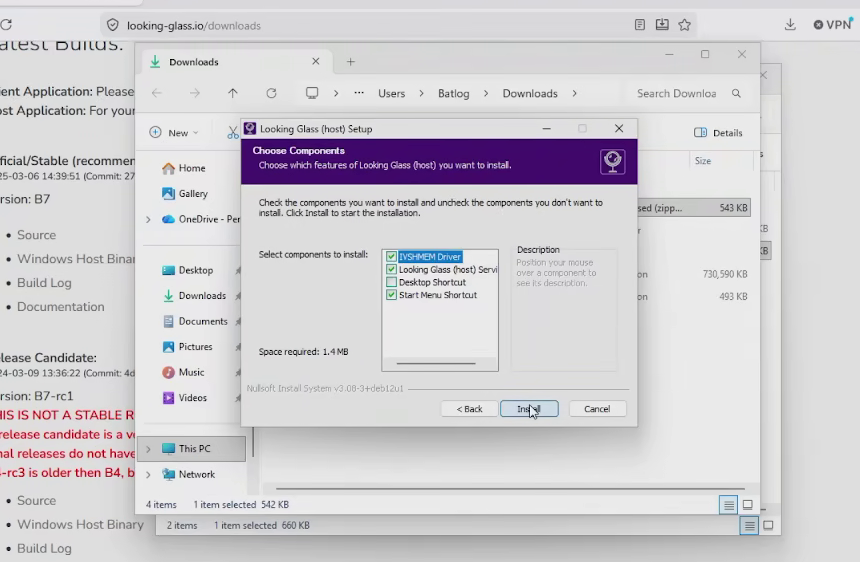
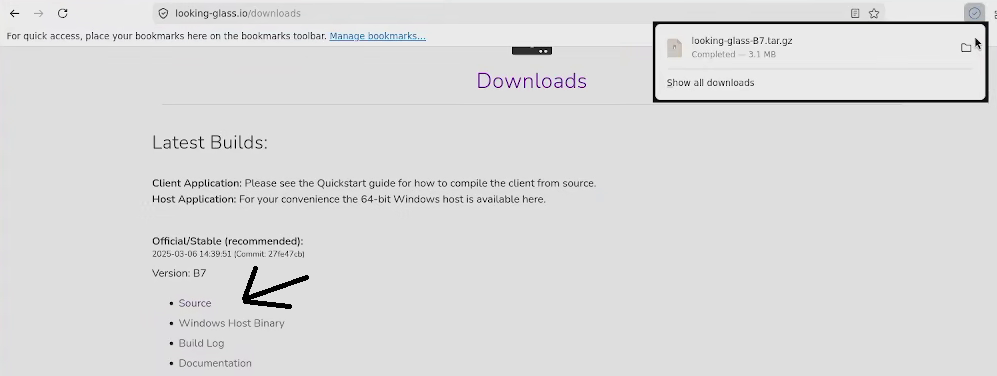
Now you need to get an application called looking-glass in order to act as your display and interface between your Linux host and Windows guest. To install it just go to their website and download the latest stable version (V7 as of June 2026) then just install it as you would any program.
Downloading Looking GlassInstalling Looking Glass
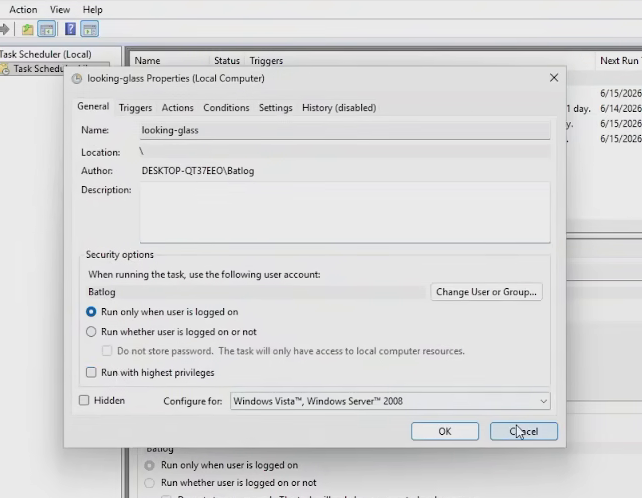
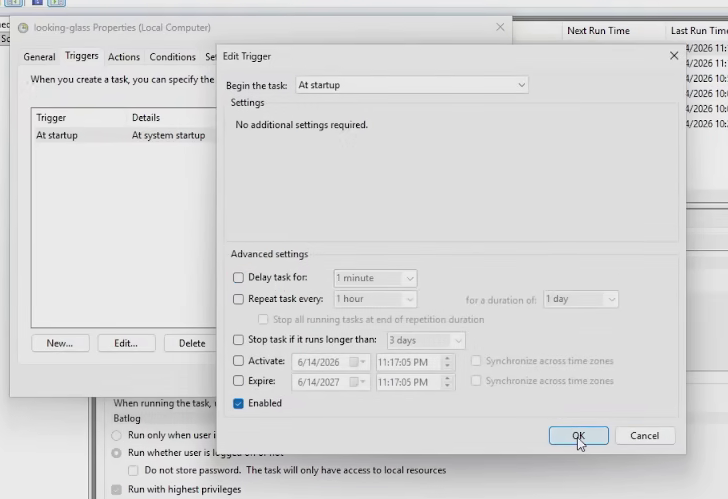
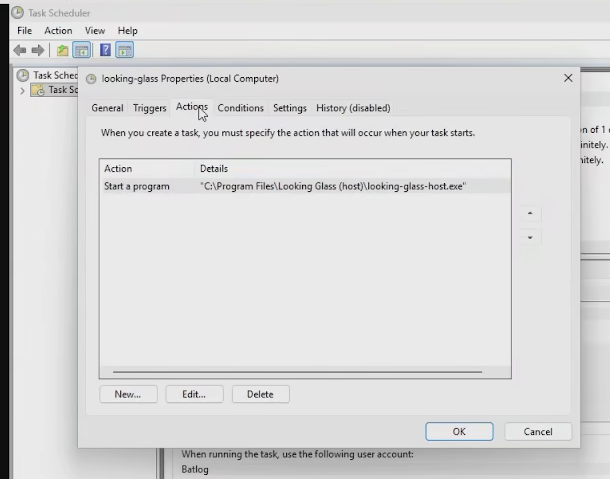
Next you need for looking glass to load at boot, this is accomplished by creating a new task using the task scheduler, just open the aforementioned task scheduler, create a new task and make it launch looking glass at boot.
Creating a new task called looking-glassHave the task at startupMaking it trigger running the looking glass executable
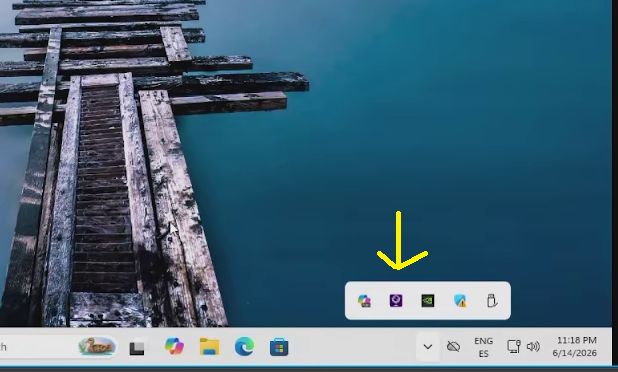
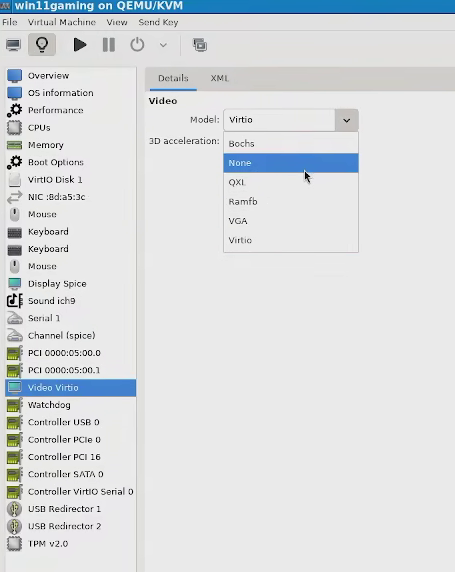
After you install looking glass and setting up the task, shut down and fire up the VM again and if your tray shows looking glass is running then shut down the machine and disable virtio display, just set your display to 'none'.
Looking Glass is runningSetting the VM display to None
You're done with the Windows guest for a bit, the last thing you want to do is CONNECT YOUR EDID Dummy Plug TO YOUR GPU.
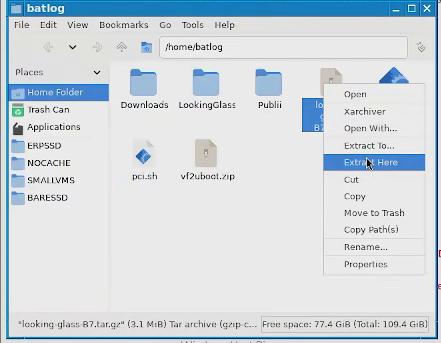
Now jump to the Linux host and download the source code for looking glass. Then just extract it.
Downloading source code on LinuxExtracting the source
IMPORTANT: DOWNLOAD AND USE USE THE 'SOURCE' COMPRESSED FILE FROM THE SAME WEBSITE WHERE YOU DOWNLOADED THE WINDOWS VERSION, DO NOT CLONE THE GITHUB REPO AS DETAILED IN THEIR DOCUMENTATION, IT WILL NOT WORK AND YOU'LL SPEND HOURS TROUBLE-SHOOTING WONDERING WHAT YOU'RE DOING WRONG.
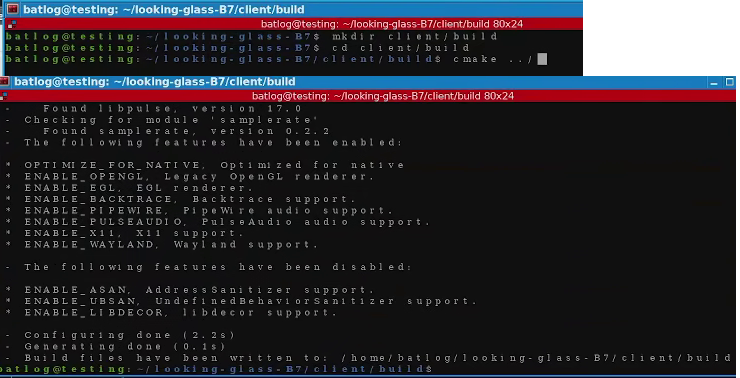
You need to build the binary next, open the directory in a terminal and create a new directory under /client/build, then change directory into it.
The Looking Glass guide tells you to install the following dependencies for debian...
... But I'll be honest, whenever I try to compile the application I'm usually missing a dependency or two, so this is a process that may take you a bit as you must try to compile the app, come across the missing dependency, install it (Make sure it's the devel version) and keep going until you get a clean binary without warnings.
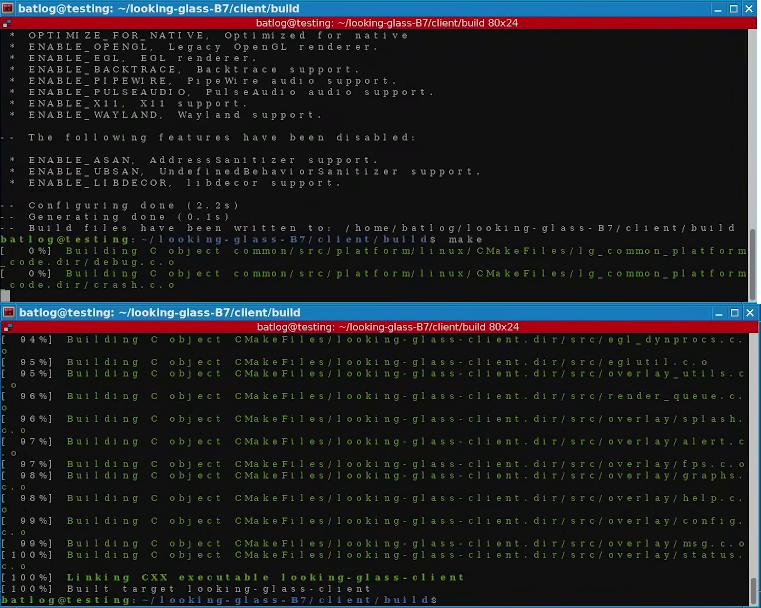
use cmake ../ and if you don't get any warnings or errors regarding missing dependencies use make, and if you get no error or warnings again you're done
This will give you a binary called 'looking-glass-client' as detailed in the make logs, hold on to it (In my case I made a copy and placed it on my home directory).
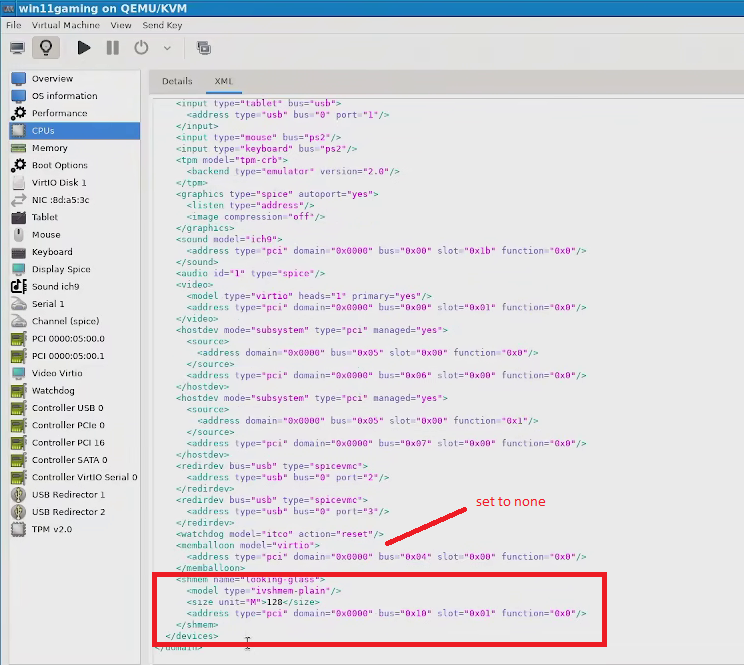
Now that you have finished building the client you have to make it connect to the host on the windows machine, for this you'll need to add a shem into the bottom of your xml of your VM as shown below. (Also set the memballoon value to 'none', I forgot to do it here)
Don't worry about the PCI values, those get auto-filled when you fill the other info and click apply.
Depending on the model of your EDID you may need to change the value based on the max resolution it supports, here is a table on which value to use (Please make sure to use the max resolution supported, not the native resolution).
Resolution
ivshem size
800x600 (600p)
16
1280x720 (720p)
32
1920x1080 (1080p)
32
1920x1200 (1200p)
32
1920x1440 (1440p)
32
3840x2160 (2160p/4K)
128
Now create a file at /etc/tmpfiles.d/10-looking-glass.conf (Yes, it has to be tmpfiles) with the following information:
# Type Path Mode UID GID Age Argument
f /dev/shm/looking-glass 0660 <your username> kvm -
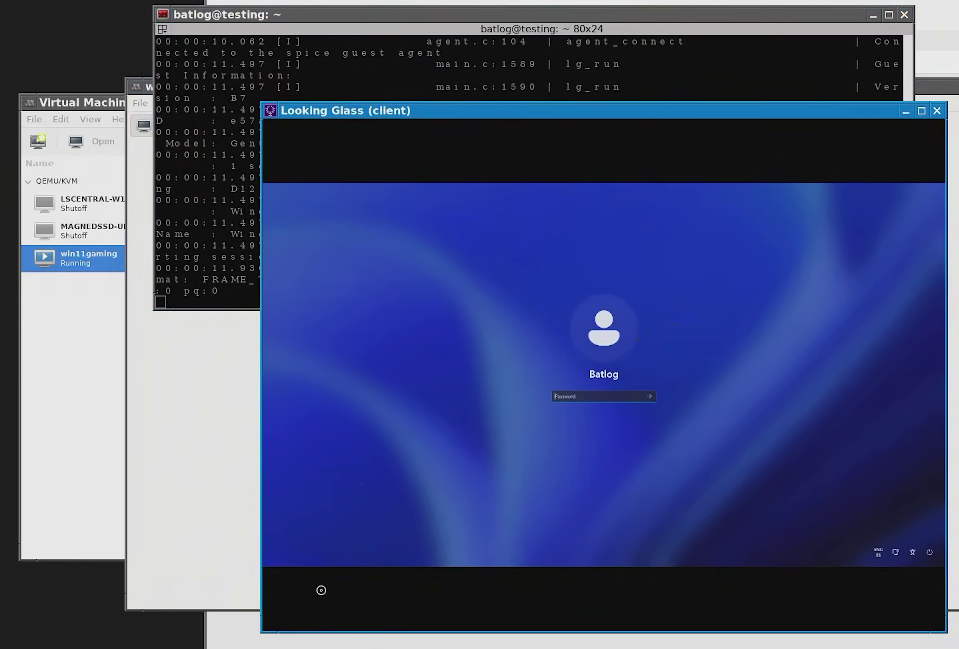
Reboot your whole system, after the reboot fire up the windows VM and execute the looking-glass-client binary, if everything goes according to plan you should see something like this:
You should now be running the display with your GPU instead of a virtuall display, you will see a massive performance boost with this, to the point where you can actually game without issues on low-performance titles or even do some work in taxing tasks like CAD programs.
But... You'll notice the next problem almost immediately, there is a 90% chance that your sound is completely gone because your EDID didn't come with speakers. There are a few ways to remedy this but I'll use a hard one by installing a program called 'scream' on the linux host and the windows client, simply because I find this solution to be the one that has the best audio quality output with little to no delays and it still allows you to run everything on a single pc without a second set of speakers or additional gizmos.
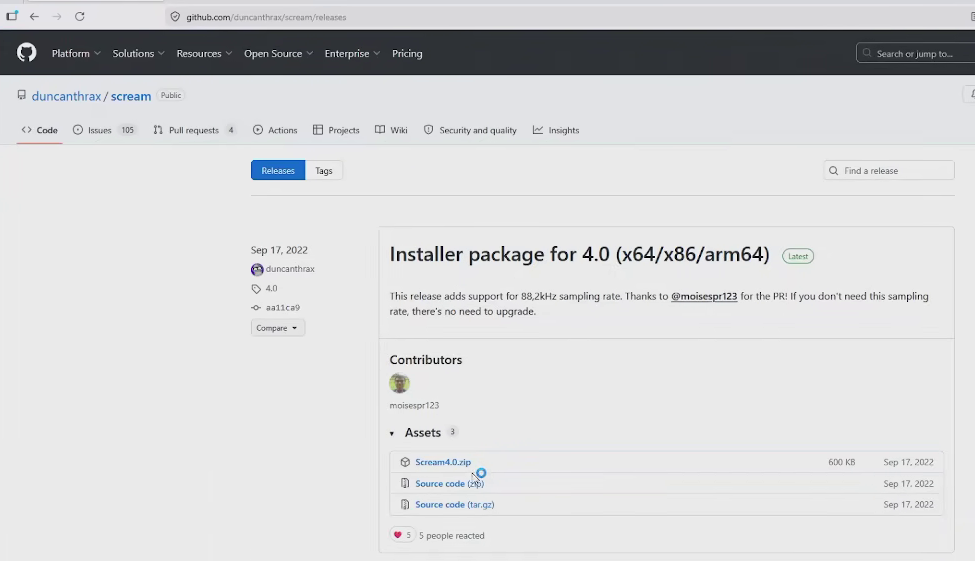
To start you just need to download Scream on your Windows guest (Don't decompress it yet).
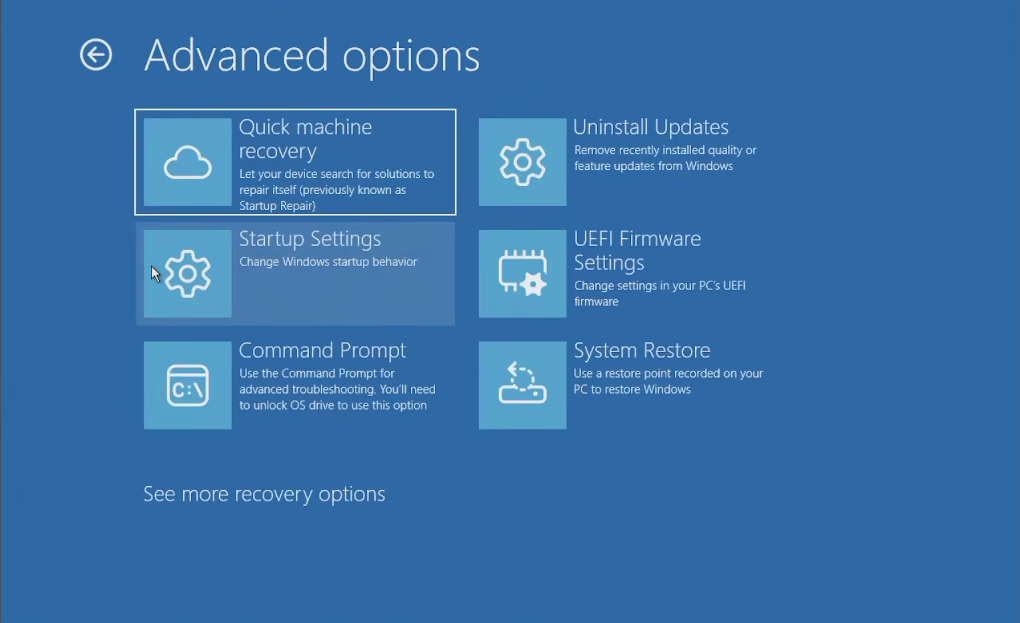
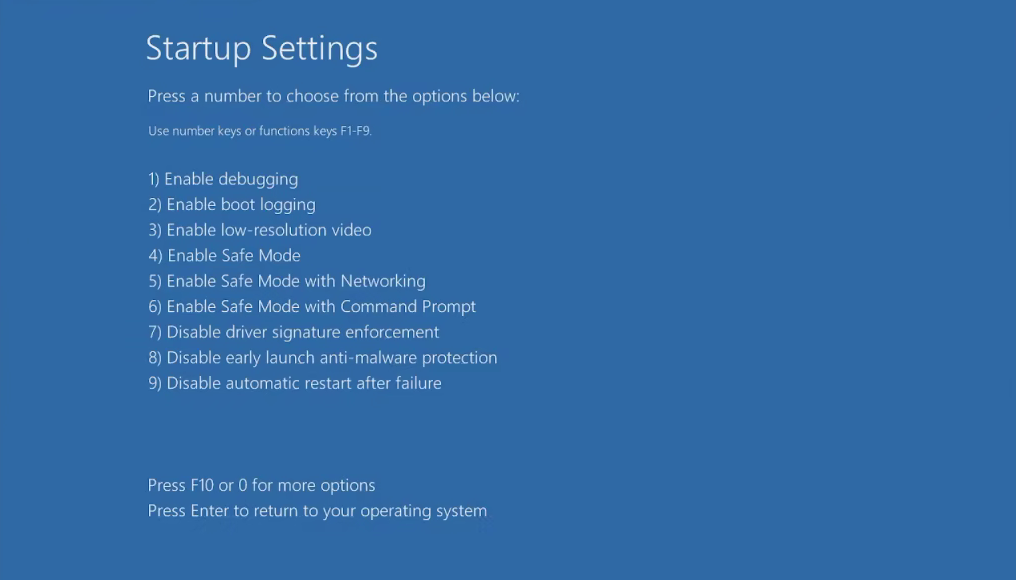
Next you need to disable driver enforcement. The way I like to do this is by killing your VM forcefully a few times until the recovery menu pops up, then select Troubleshoot -> Advanced settings -> Startup settings and rebooting, then pressing F7 to disable driver enforcement
Select Startup options at recoveryPress F7 when prompted
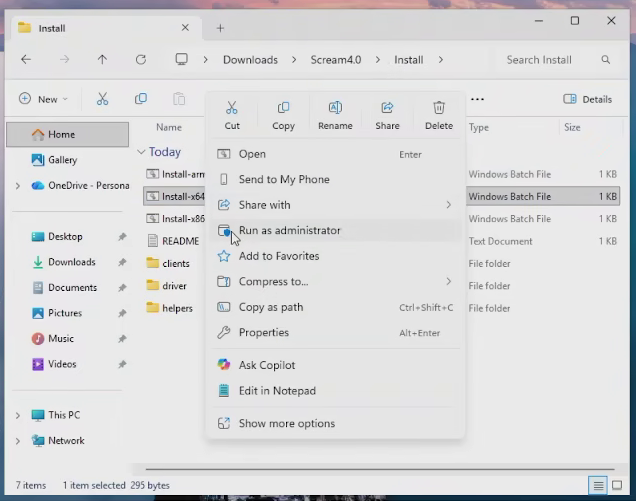
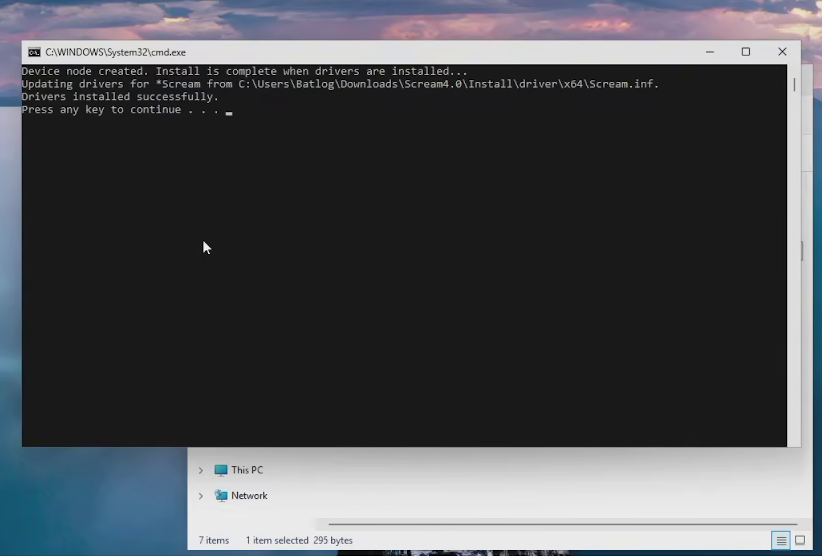
Once inside windows again decompress the archive and select 'run as administrator' in the bat script provided, the script will tell you if the install was successful.
Running the provided bat as adminA successful scream install
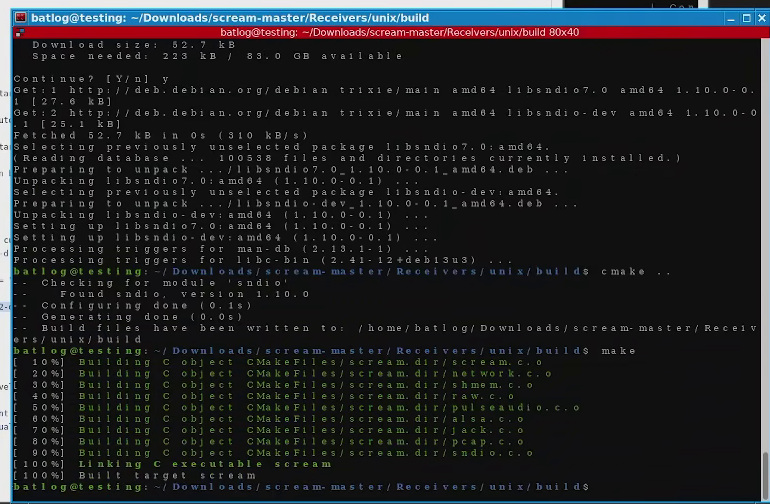
Next you'll have to build Scream, the process is pretty similar to looking glass, download the source code, make a directory under /Receivers/unix/build, run cmake, make sure you don't have any unresolved dependencies and if you do resolve them, then run make.
If you don't have any dependency problems the cmake and make commands should resolve in short commands like this
Afterwards move the resulting binary to /usr/bin
At this point I ran into an issue where I ran into an undeclared dependency for pulse audio, after installing and rebooting it worked normally.
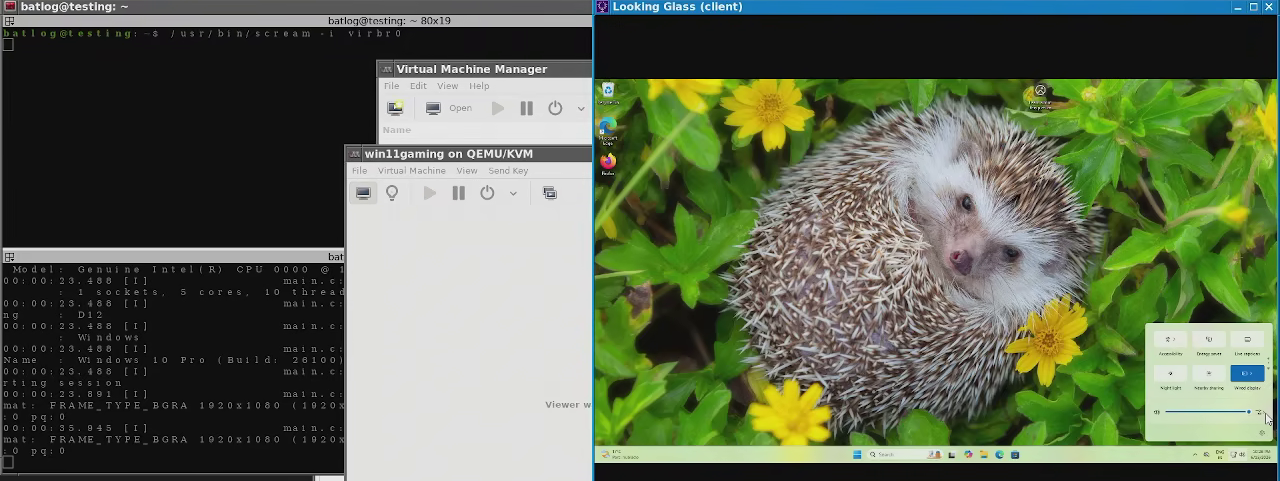
To use scream what you have to do is execute it pointing to one of your virtual machine's virtual networks (In my case and I assume most people's virbr0, therefore I must execute /usr/bin/scream -i virbr0, the VM doesn't even need to be running), while running it won't appear to be doing anything, not even when it establishes a connection successfully.
Fire up your VM, run scream in one terminal and looking glass in another. The end result should look something like this:
(I know you can't hear it but I swear it has sound)
If you can't hear any audio make sure to switch the sound option in your VM to CH9.
If you want a script to tie it all up and have the computer, looking glass and scream to start with a single command or .sh in the desktop it's as simple as something like this:
(Do mind the single ampersand operand, running two will run one service and close the other)
You may think you're done here but you'll likely notice an odd behaviour on high-performance games like cyberpunk, any unreal 5 game or really anything that makes use of the card, this behaviour is caused mainly due to two issues, a new and very useful and wonderful feature in Windows that throttles your CPU and the fact that the clock of the host and the guest aren't running synchronously to one another. If everything looks fine except for the crappy frame rate move to the next section, we're almost done.
Side note: I recommend creating a new virtual network and use it for scream and only scream, it doesn't use a lot of bandwith that's shared with the rest of the data your Window guests uses but it uses enough to be noticeable. Ultimately though, this really doesn't make that much of a difference so I decided to skip it in this guide.
Step 6: Correcting the clock, some performance enhancements and disabling the Windows option throttling performance (Core isolation)
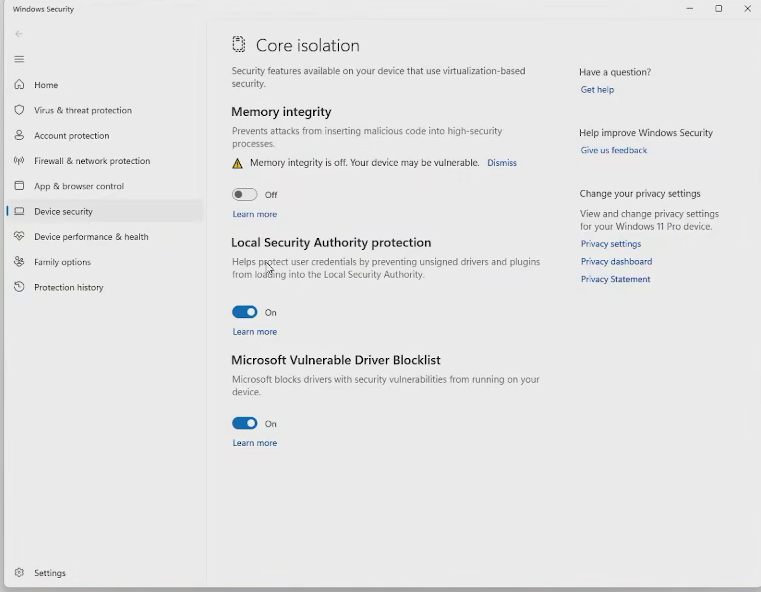
The first thing that you wan't to do (Because really it's the easiest) is disable core isolation/memory integrity, just look in settings for it and un-toggle the switch, then turn off your VM.
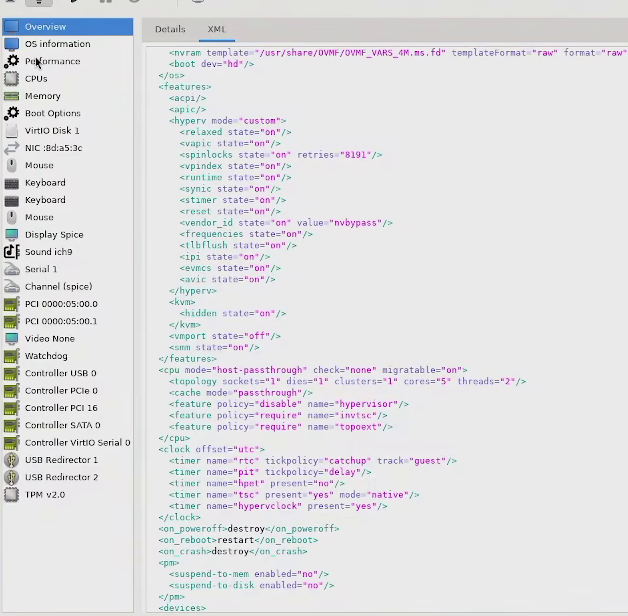
Next you need to correct the clock by setting it to utc, correct the following lines in your VM XML (While you're at it also add the missing enhancement lines to the cpu and hyperv segments, keep in mind evmcs is an intel-only feature):
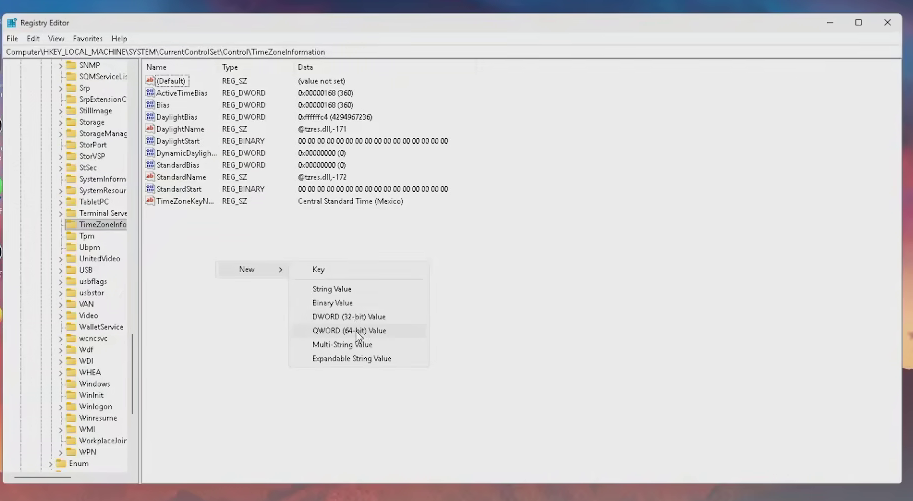
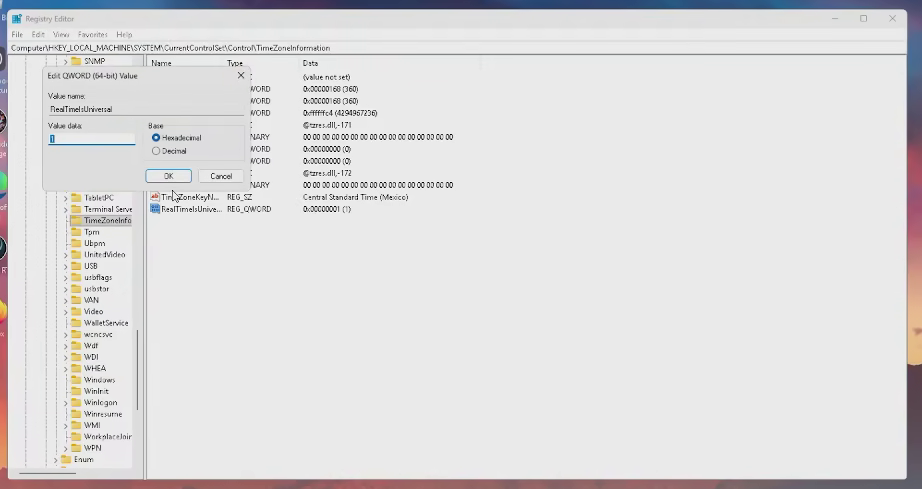
Fire up the VM again and you'll immediately notice the clock is now several hours off. to fix it go to the sysreg and add a new QWORD under HKEY_LOCAL_MACHINE\SYSTEM\CurrentControlSet\Control\TimeZoneInformation called 'RealTimeIsUniversal', edit the QWORD to 1 as shown below
Creating a new QWORDSetting RealTimeIsUniversal to 1
Aaand... that's it! No, really. You're finally done. Turn off the VM, turn it on again and if you see the hour is the same as your Linux Host then it's time for you to install some games.
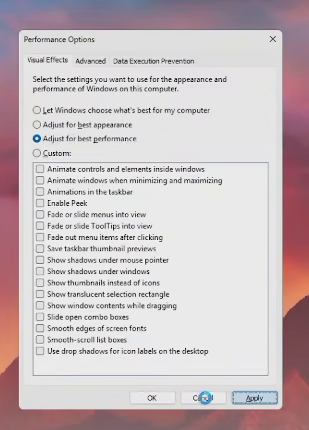
optional: You can turn off all visual effects on performance options, honestly I haven't seen this making any difference because of how bloated Windows 11 is but hey maybe it raises the FPS by 1.
Step 7: Time for some gaming!
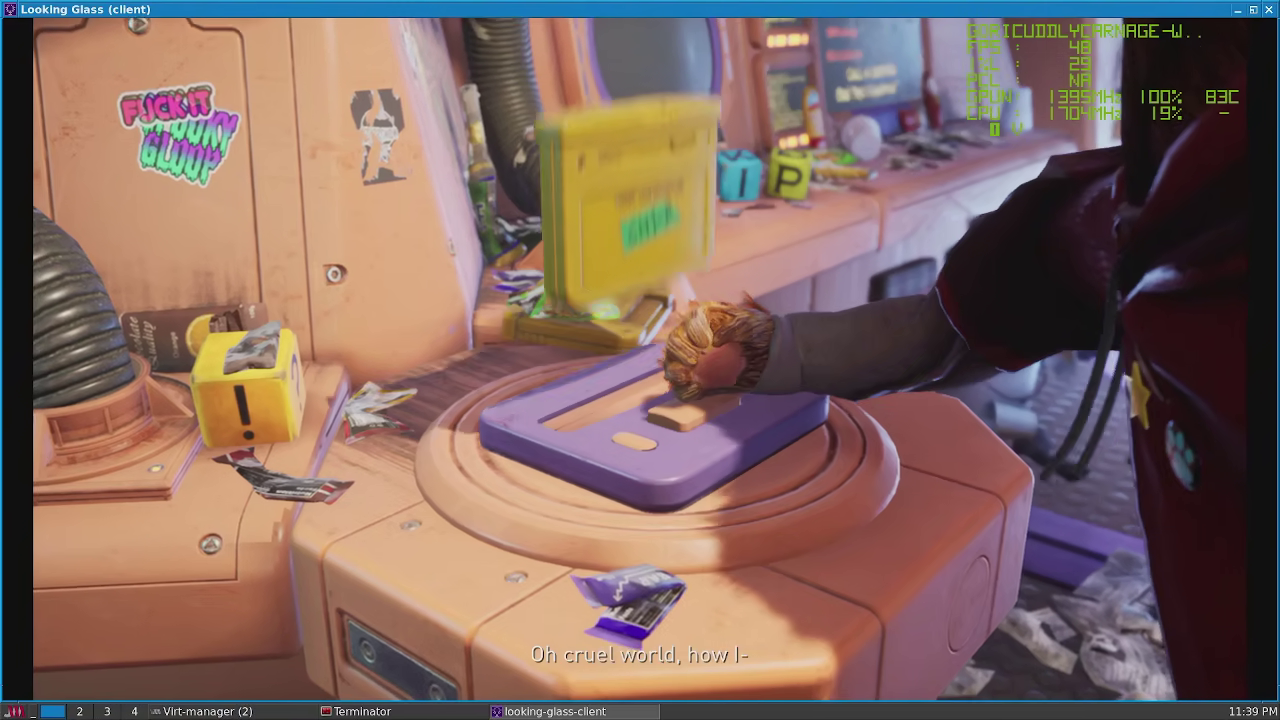
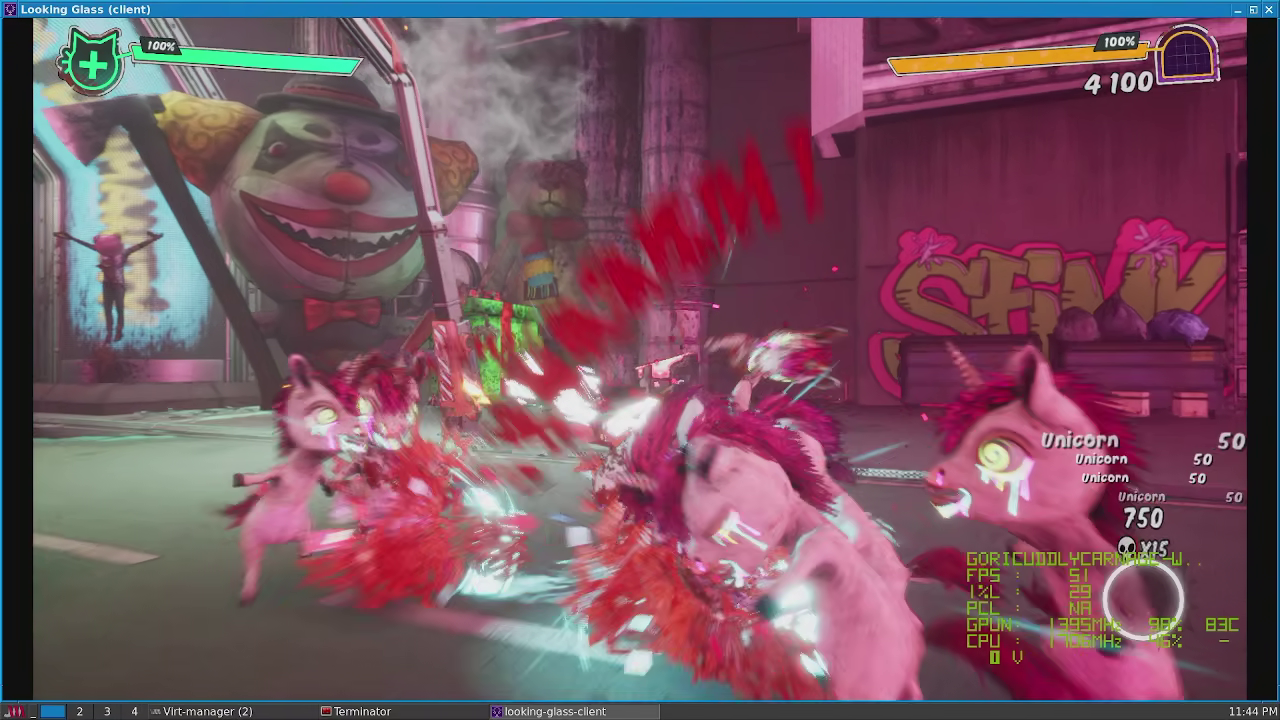
For this I picked two games, QUAKE 2 RTX and Gori: Cuddly carnage. The reason for this is because Quake2 RTX is actually extremely demanding and in my opinion underrated for RTX benchmarks and Gori just because it's an unreal engine 5 game that doesn't take 50+ Gigs to install and it's choke-full of particle effects (It also has an intro cutscene rendered in-game that works as a good benchmark). I knocked down the resolution to 1080p because to be honest my poor RTX 1000 (Equivalent to a cut-down GTX 1650) cannot handle the Neutron Style.
Gori ended up with an average framerate of 50fps and 1% lows of 29 at both cutscenes and gameplay with very little drops.
Gori during cutscenesGori during gameplay
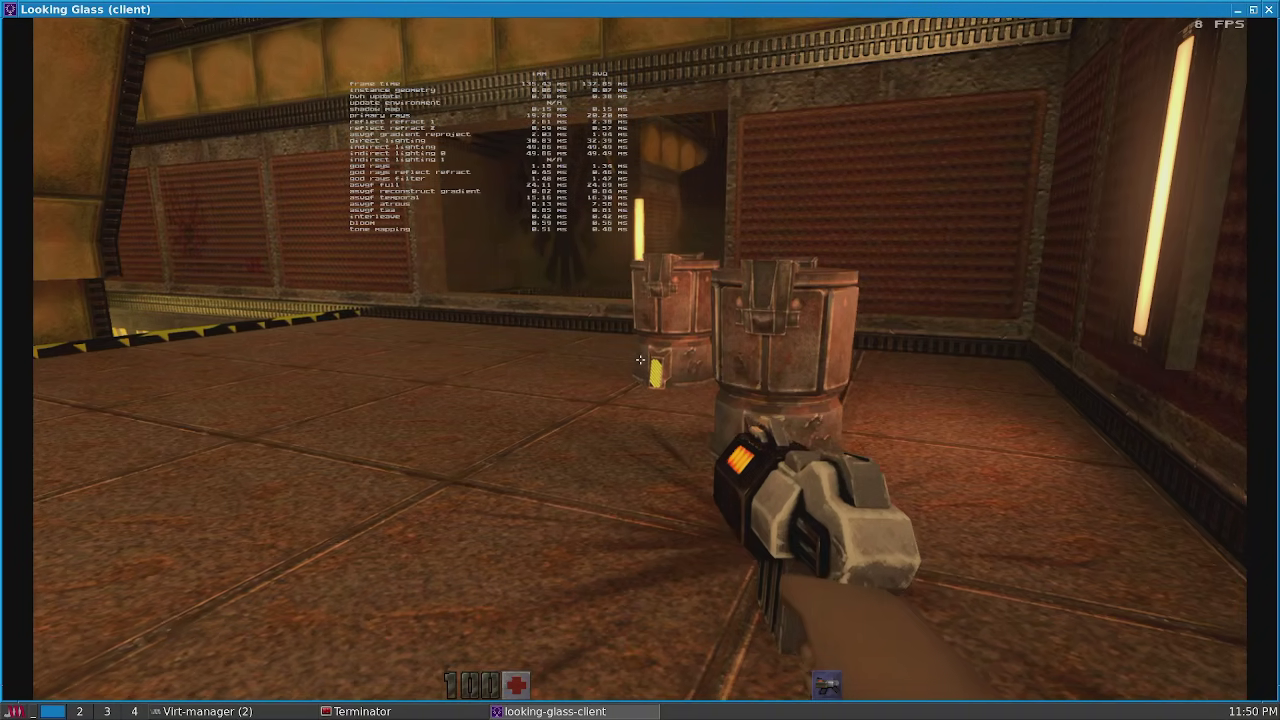
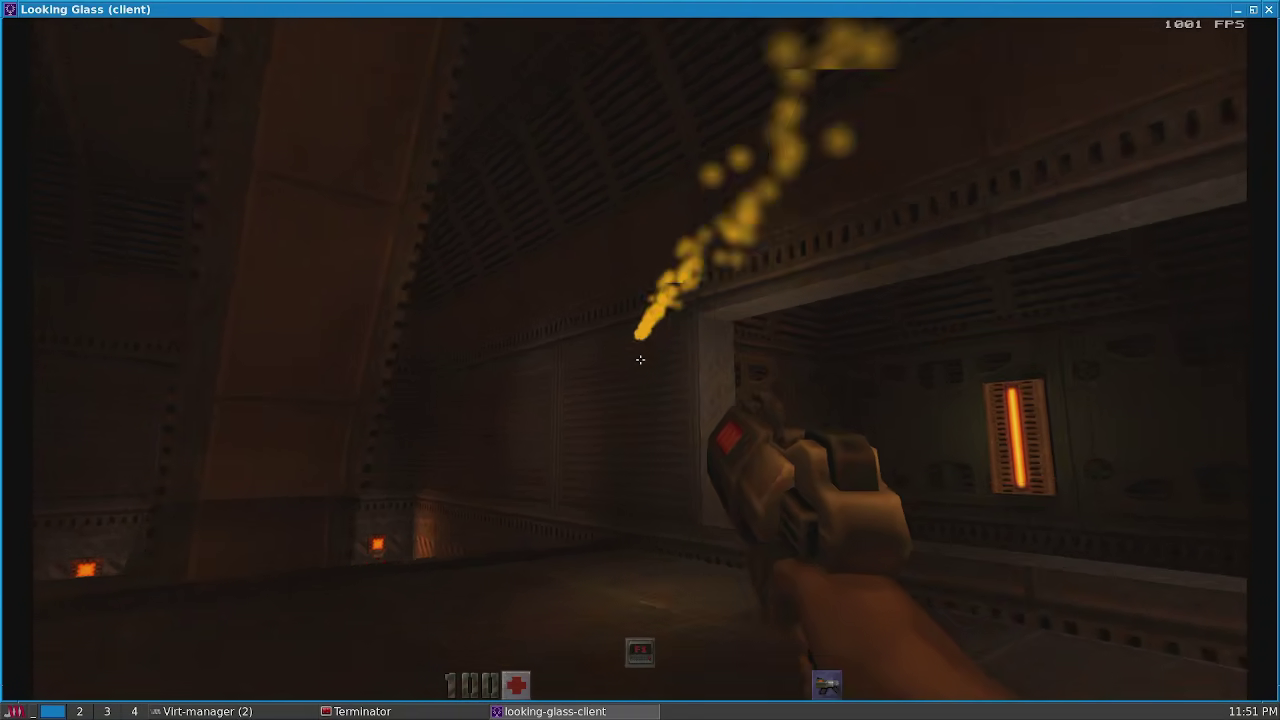
As for Quake 2 RTX... Well.. I ended up with 6 FPS (lol). Even funnier I got 1000+ FPS if I turned RTX off.
RTX ONRTX OFF
I completely forgot about it while configuring all this but the RTX 1000 is in fact, not an RTX card. It has 0 RTX cores so these results are completely normal.
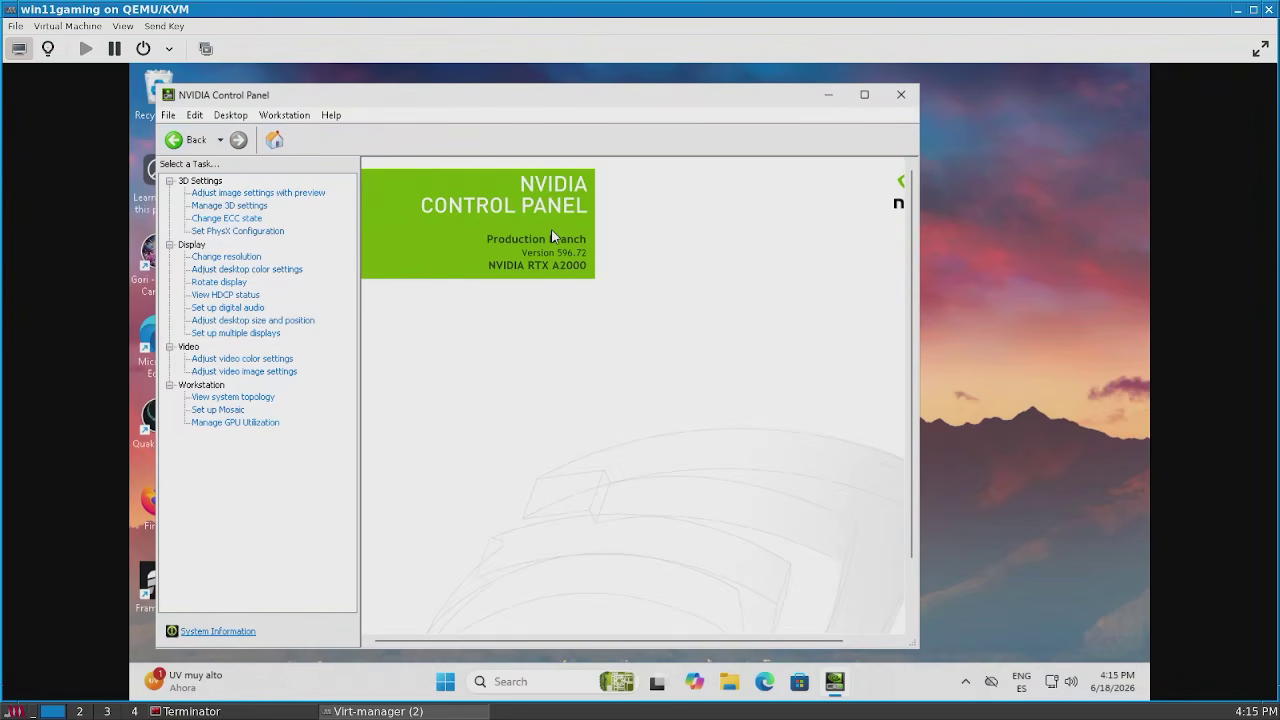
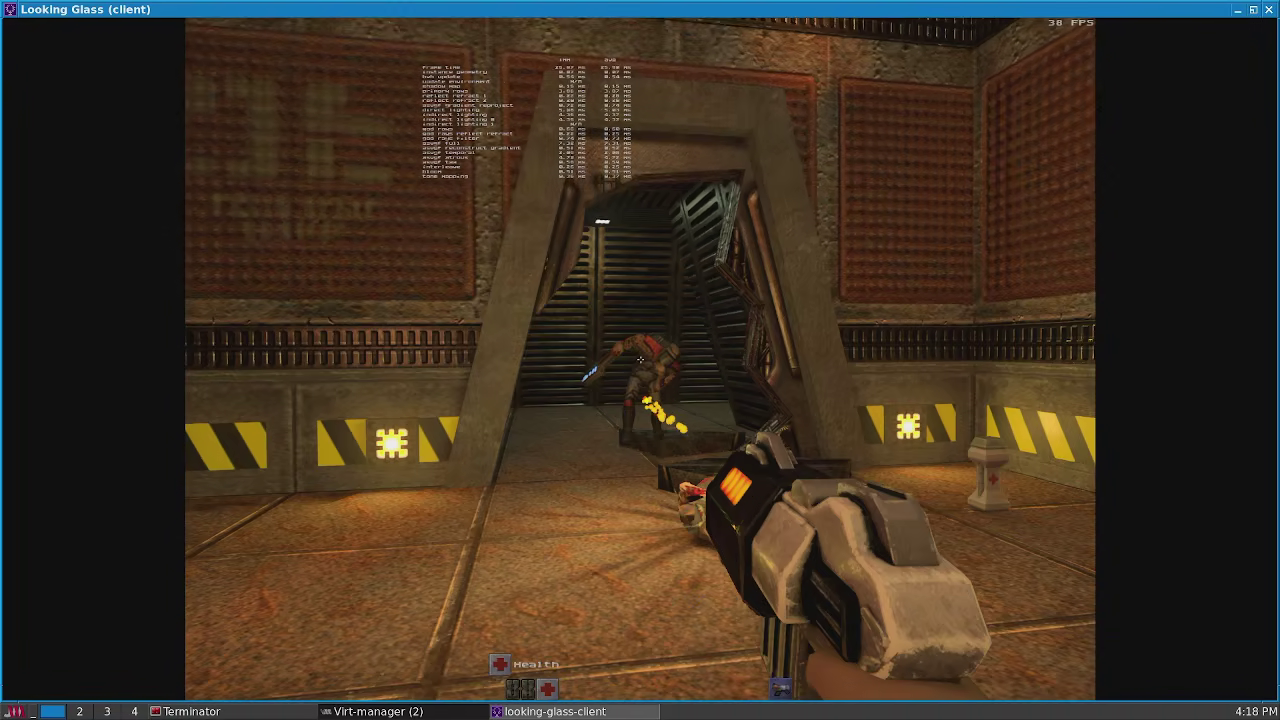
Still, I wanted to check if I hadn't screwed up so I went back to step 4 and swapped my RTX 1000 for an RTX A2000. This time the mighty 30 crtx cores of the A2000 gave me the mighty impressive result of 30 FPS on Quake 2 RTX. So yes, this is in fact working properly.
RTX A200 LoadedRTX ON in a card with actual RTX cores
If you like the results all you have left is to activate your license and relax.
Addendum 1: EDID Dummy plugs
I want to make a quick comment on EDID Dummy plugs because I feel there isn't a whole lot of info about them online and their operation, while simple, is a bit more nuanced than one may think. If you've never heard of them EDID stands for "Extended Display Identification Data" In other words they're the chips inside monitors that tell the GPU what kind of monitor you're using but since they're dummies there's no actual monitor attached to them, basically they serve the purpose of fooling GPU's into thinking there's a monitor attached.
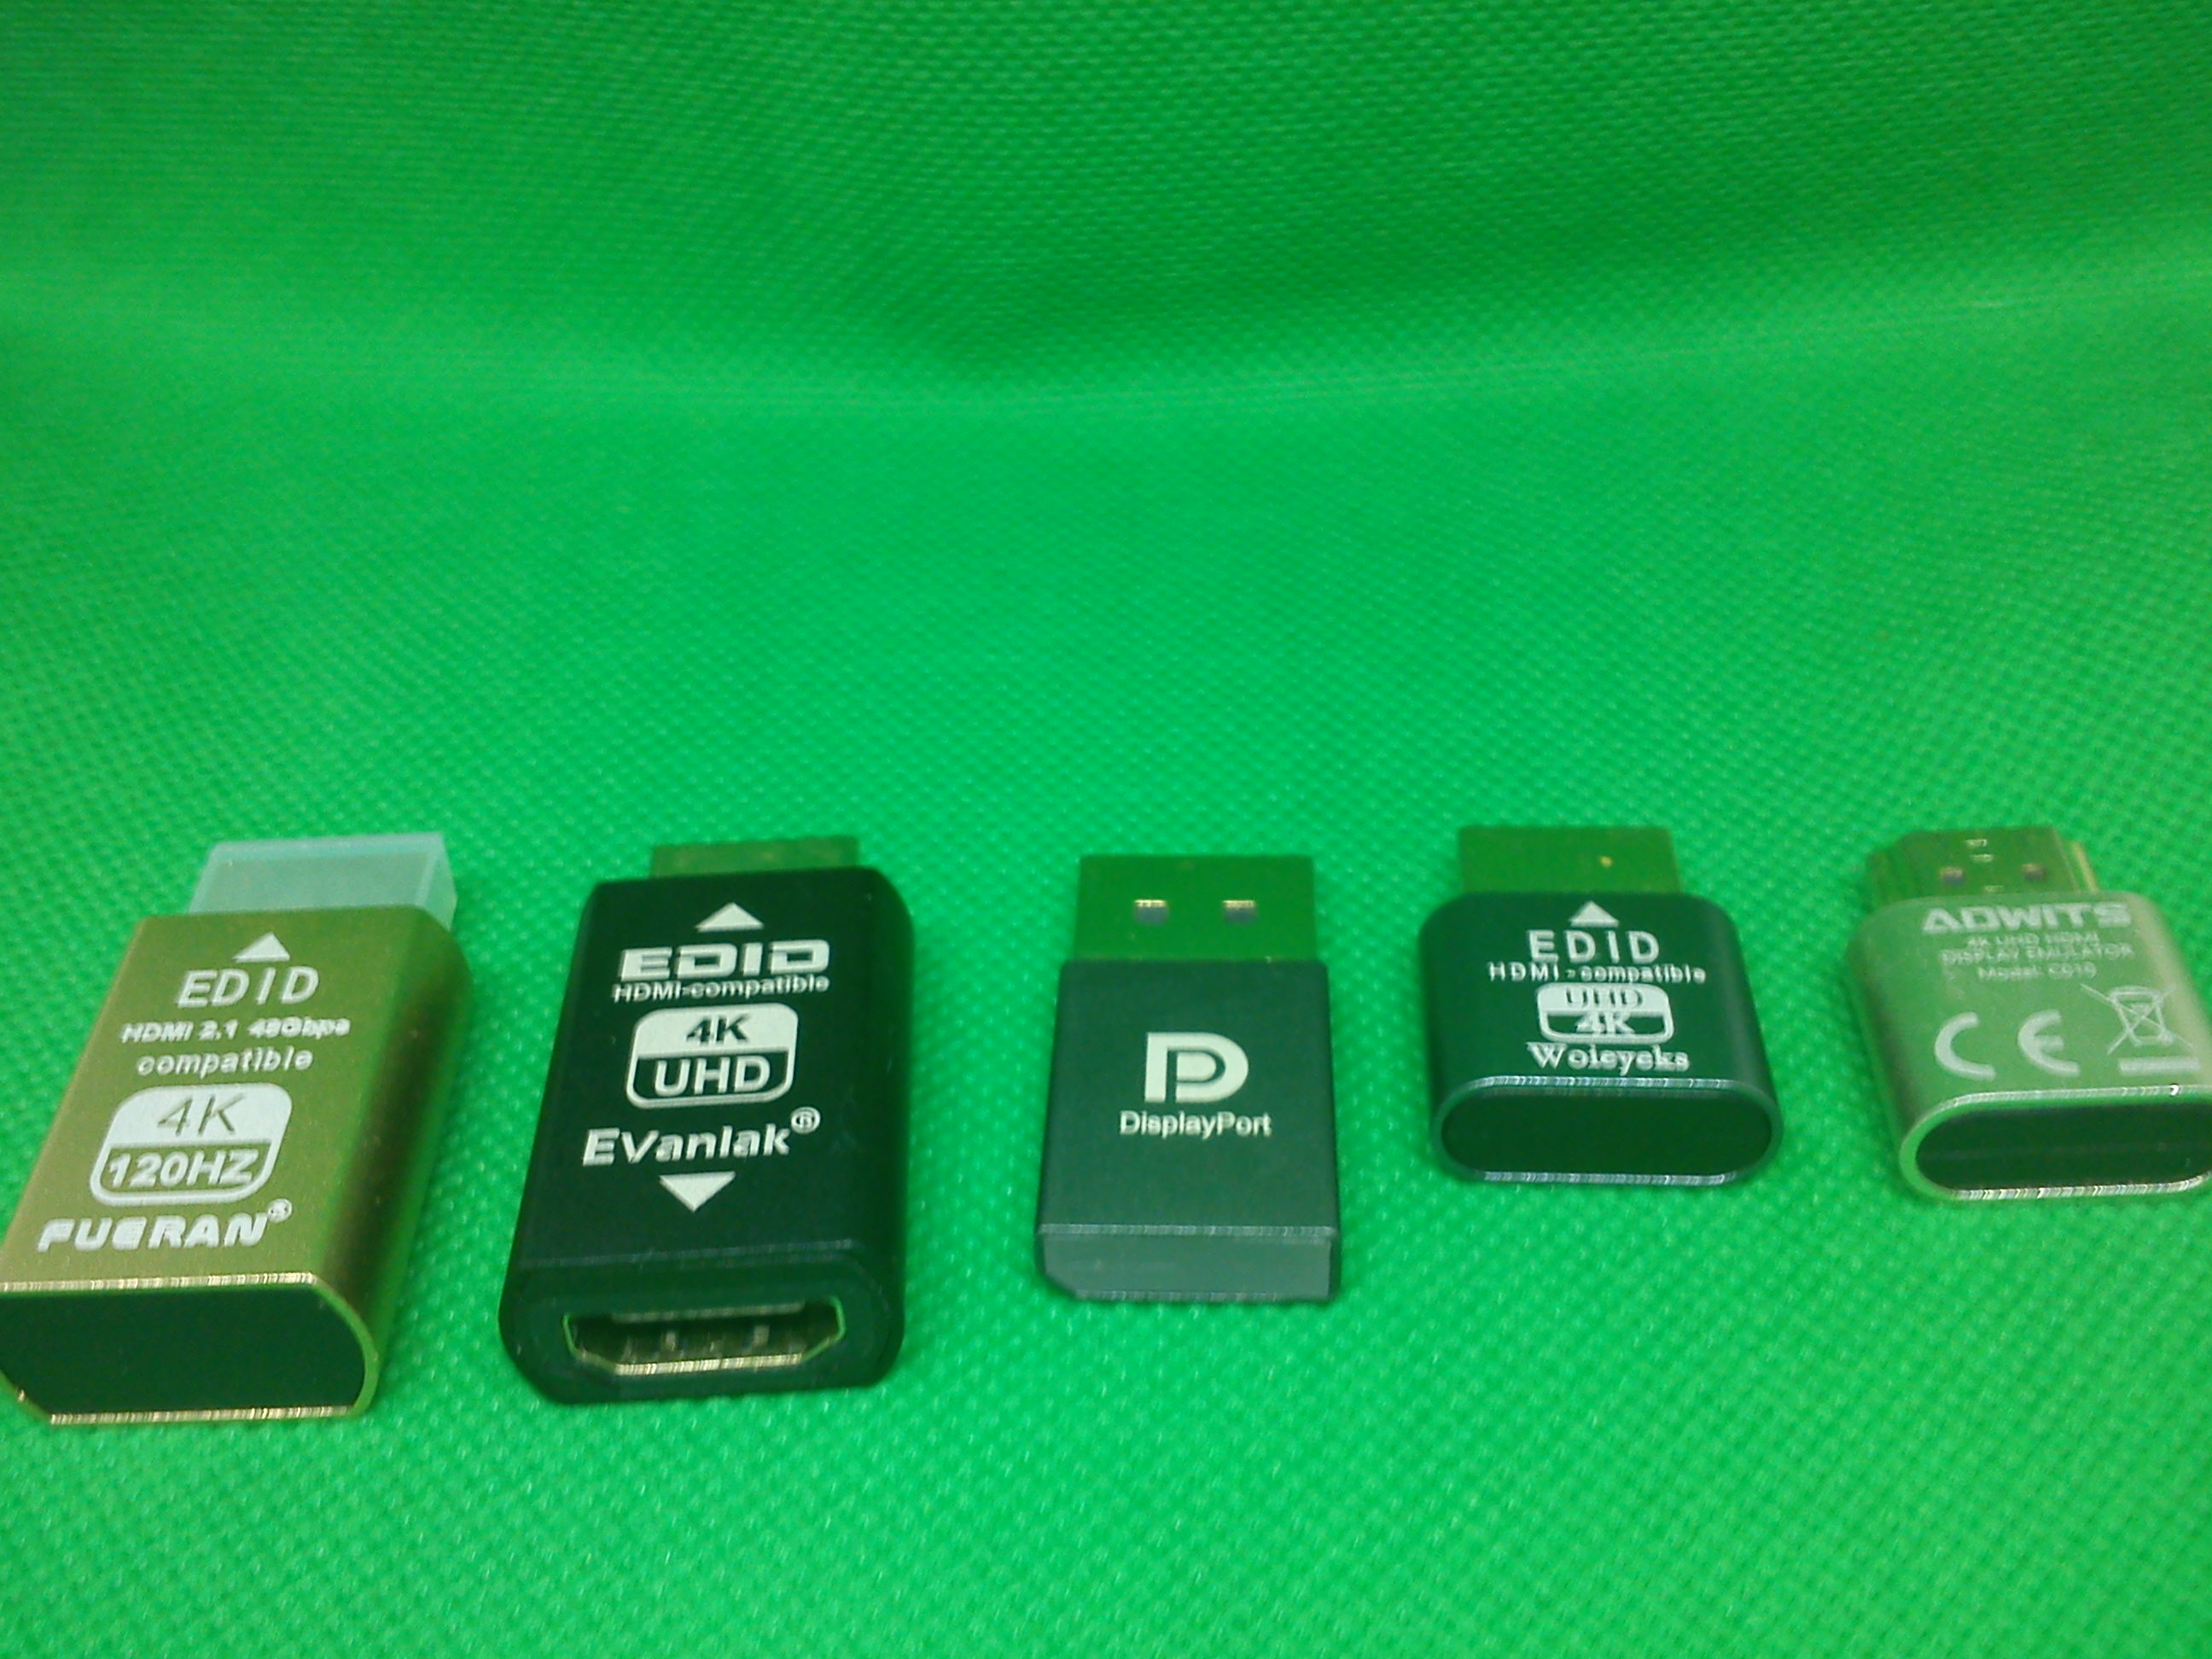
An assortment of EDID Dummy plugs
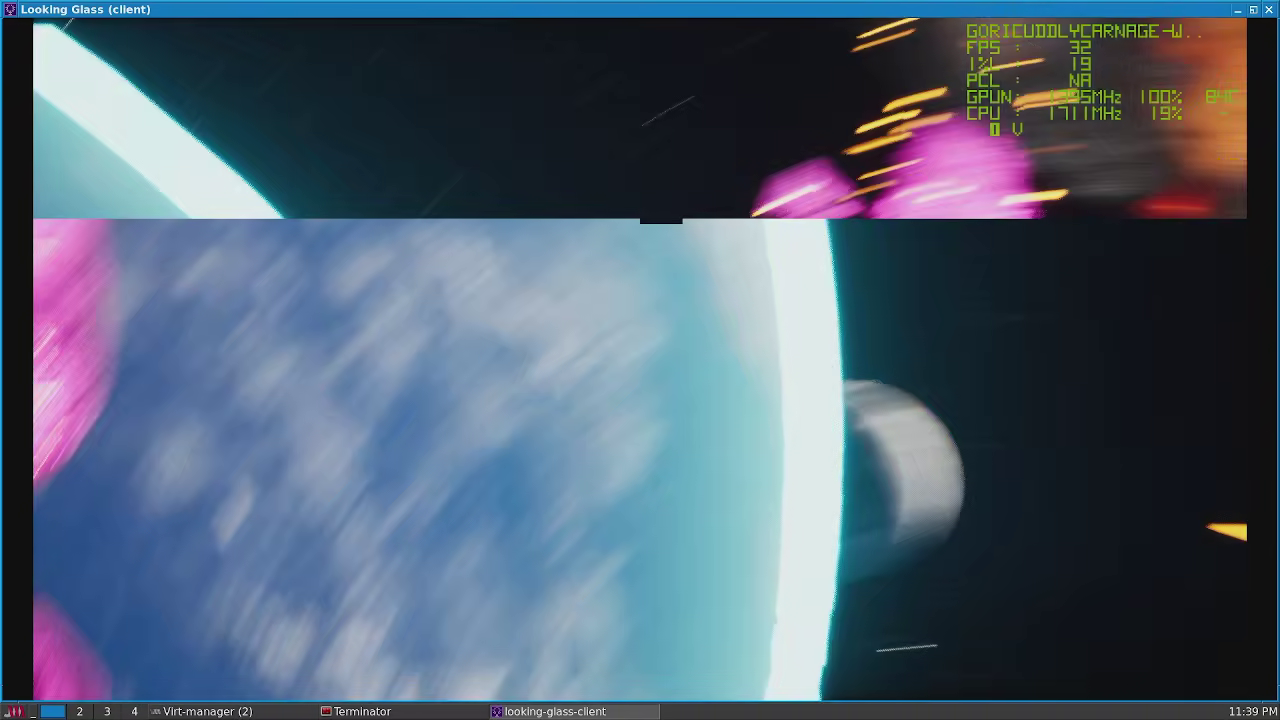
First of all, try and get an HDMI plug (And by extension a graphics card with HDMI output) I used a DP dummy plug for this guide and yeah, they work great if you're doing remote work, but they're rather trash for gaming, refer to the screen tearing below (Which I swear is 100% on the dummy plug as evidenced by the fact the framerates are solid). I haven't come across a good DP EDID but who knows you may have better luck finding one than I did.
DP dummy plug screen tearing
Now that you've discarded the DP dummy plugs, which Dummy plug should you pick? I'll be honest here they're completely luck of the drawer. Fueran and Evanlak respect the specs they advertise but they're expensive and don't ship everywhere, the kicker though? I don't use either of those, instead I use the shitty gold one on the far-right that has Adwits written on it (A company that I'm not fully convinced actually exists) and I bought on Amazon in a package of 3 units for 10 USD. Why? Because it was ripped from a monitor that had integrated speakers, which in turns means it has integrated speakers (Despite having no output), which means I don't have to use scream or any other method to get audio out of it, I just run looking glass and the audio works, it's great. Honestly for this reason alone where you may luck out and the fact there really isn't much difference between an expensive edid dummy and a cheap one (Other than refresh speeds at higher resolutions) I recommend you buy the cheapest one that can give you 120hz at 1080p or whatever refresh rate you're looking for.
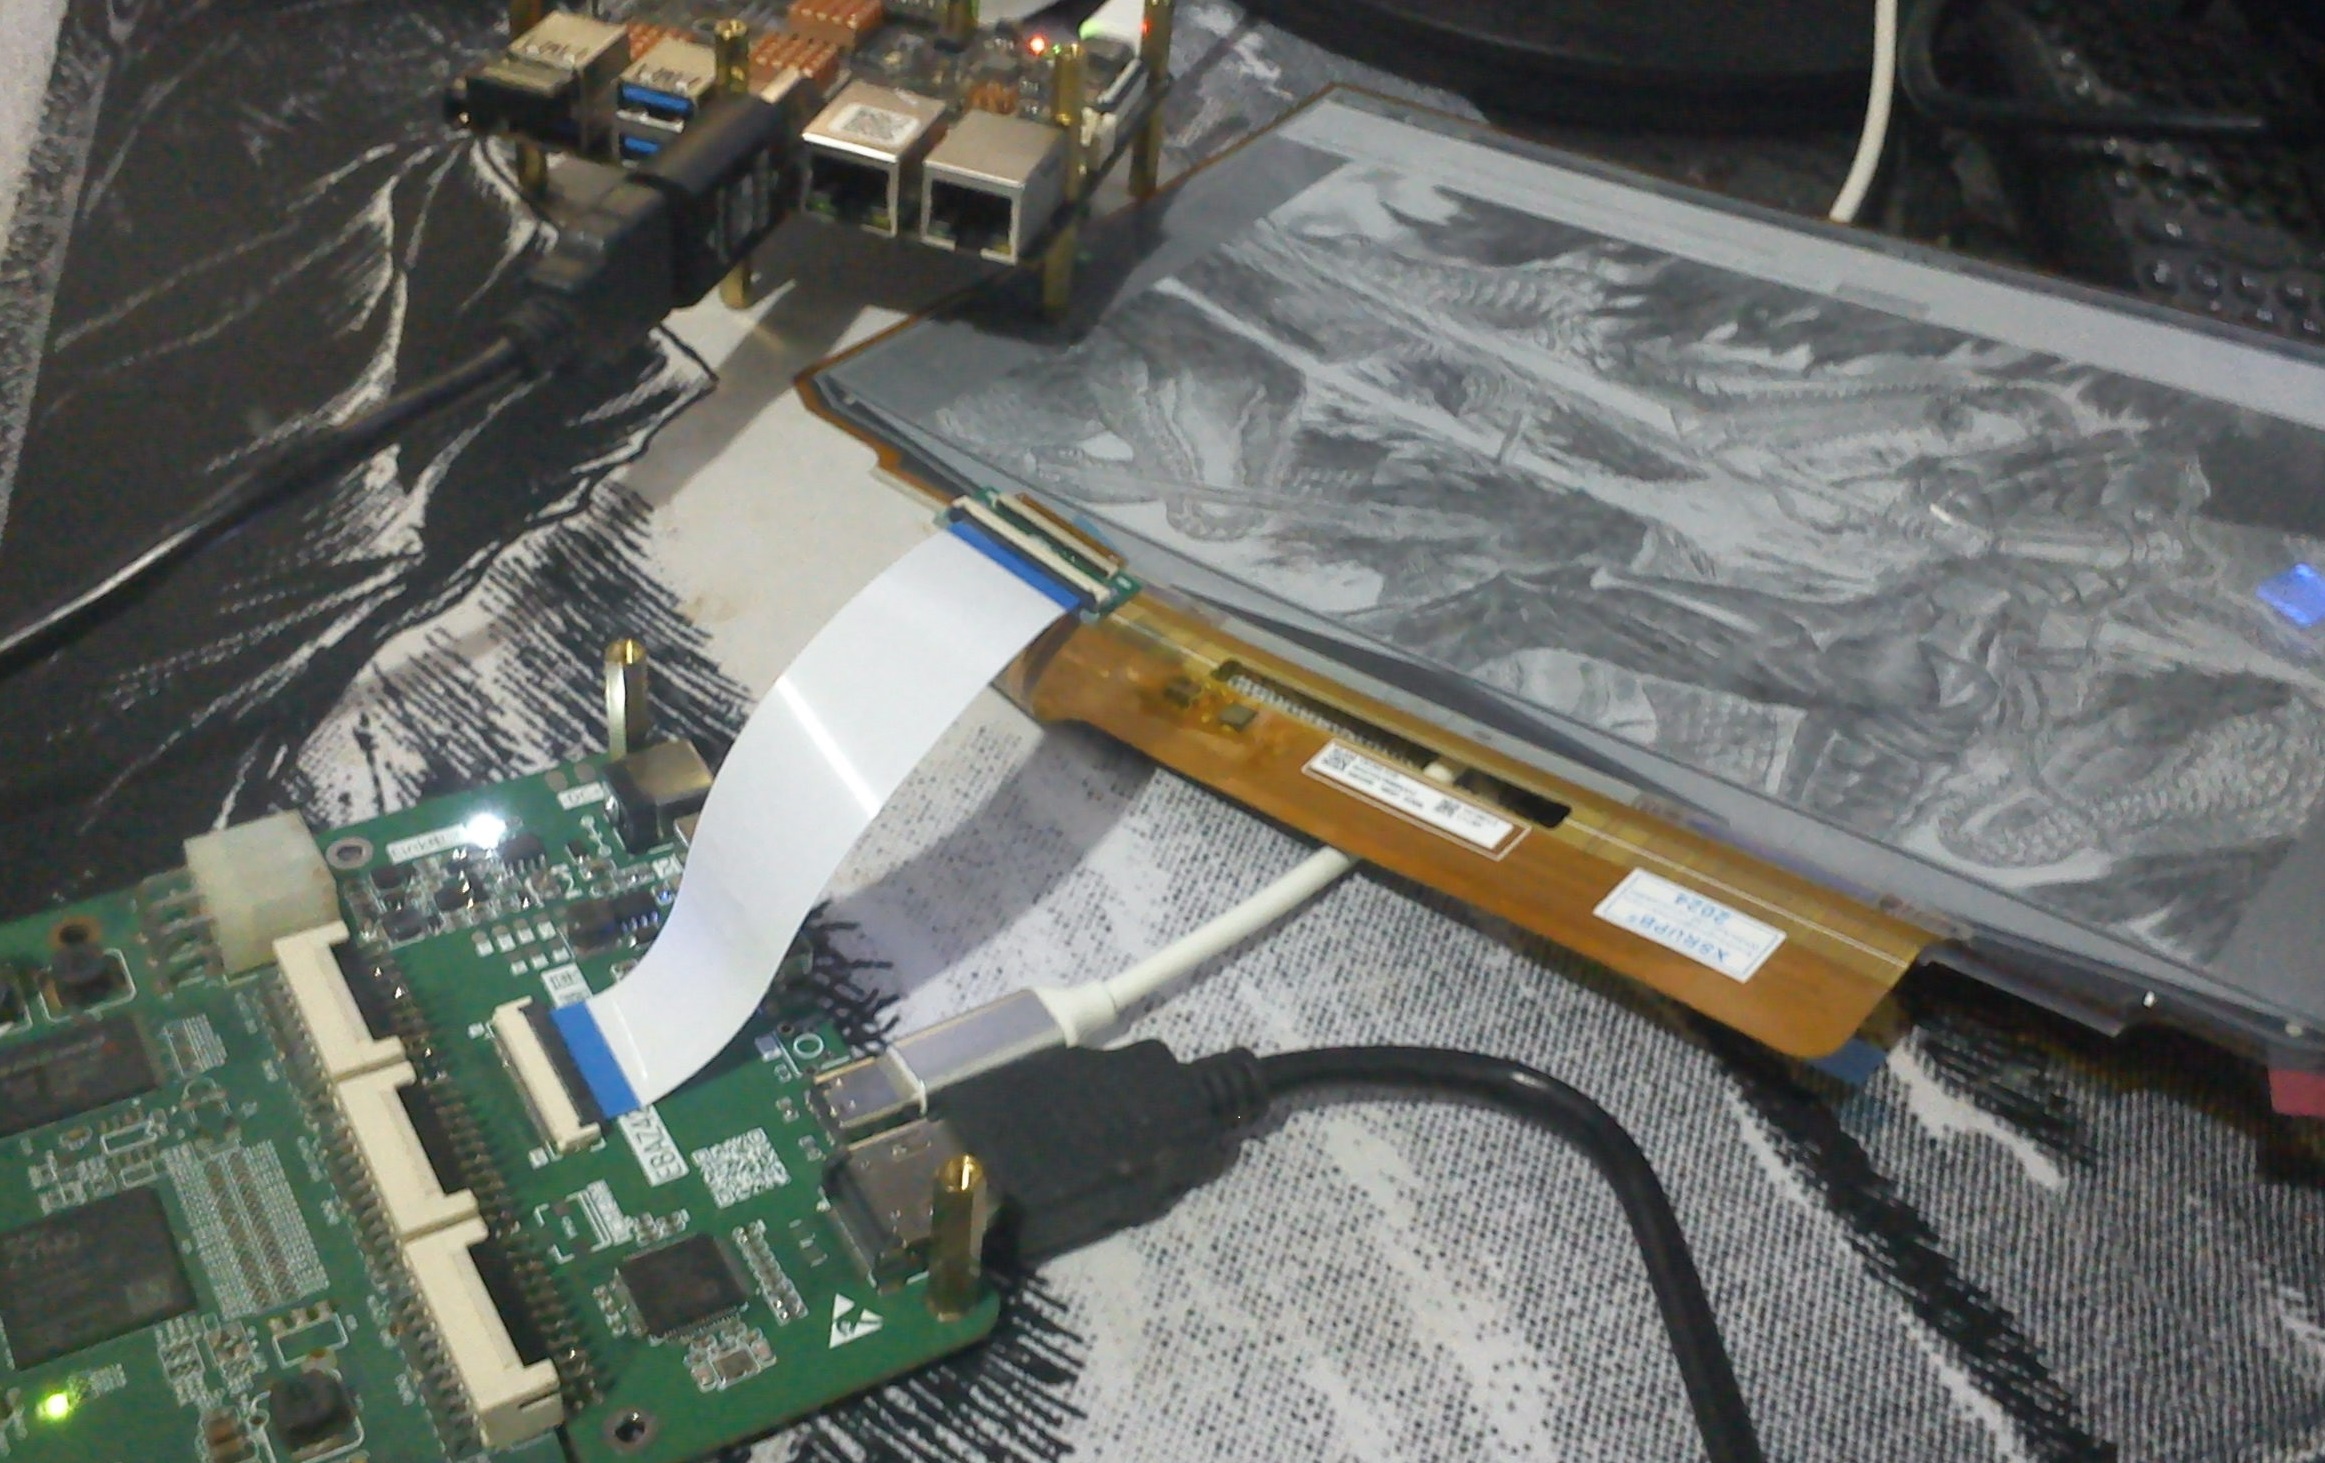
On the subject of the black Evanlak don't get a dummy plug that looks like it (With a male and female end. They're great at what they do but what they do it's not gaming, rather, what they do is fool a device to think there's a monitor or TV plugged in and send a clean signal to the monitor or TV on the other end. Why do this? I think it's rather obvious for some people but I'll just spell it out: these are mostly used to bypass HDCP and record footage from a device with a capture card. Personally though? I use them to patch video signals for wacky monitors and GPU's, refer to the image below of an imagination GPU sending a signal to a repurposed crypto-miner picked up from the literal garbage being used as a controller for an e-ink display to better understand the kind of wacky video signal nonsense I'm talking about.
Addendum 2: Why I don't use hooks and a note regarding other cards
I feel like someone may read other guides and wonder why I don't use hooks, and the reason for it is because if you have a monitor or EDID dummy plugged into your computer and your motherboard isn't from a server or professional workstation... chances are it will crash the moment you fire up the VM. The reason for this is because Xorg tends to generate a new display (Even if hidden) whenever a monitor is plugged in and the moment you fire up the VM the display server has no idea what the hell just happened to that display and goes kaput.
There are ways around it by scripting and I don't recall if this also happens on Wayland but regardless it's out of my use-case and the less trouble-shooting I have to do the better, so I just don't do it. As I stated in the beginning I've been using a Windows VM regularly for over 2 years now and I'd rather not have to fix it every boot.
Hooks are great when working with workstation cards that have no video output (E.g. Nvidia Tesla cards) but for gaming? They're not worth the hassle, sometimes I've found it's necessary to do both loadiong the vfio drivers AND using hooks (Arc cards in particular gave me a lot of grief with this).
And while we're on this subject: Don't use Arc cards, just don't. I love them but the moment they detach from the VM (Even for a second before the virtio drivers kick in) they're loaded into the kernel and your host computer will just crash, moreover last time I used one with looking glass they weren't supported so it's not like you can even make proper use of them anyways (For the record if you want to give it a shot what I ended up using as a replacement was freerdp).
As much as I don't like Nvidia I have to admit they're the easiest solution for a virtual gaming PC, even AMD (Which is the best at bare-metal Linux) gave me a headache once as it wouldn't load without further modifications to the xml (long story short I had to dump the BIOS of the card with GPU Z and then load the BIOS into the VM manually with something similar to the lines below).
Update 13/09/2026 Addendum 3: An actual use for hooks
Recently I wrote an article where I had to use hooks in order to get a virtualized firewall working with physical network interfaces. You can find the article here.
The reason why it works in that instance and not here is because you really don't run any risks for doing so, the ethernet connections have no video output and in the worst-case scenario you just lose your ethernet connection, which isn't the end of the world if you have direct access to the machine where you're making the changes and are able to roll it back (In this instance losing the connection on the host is desirable anyways due to the added security that provides).