Unlike most Crypto currencies Monero seems to have retained its' value over the years but due to the criminality associated with it not a whole lot is said about it. I therefore want to make a guide on how to configure it to mine via P2Pool because to be honest it's by far the best way to mine it if you wanna do it solo and without breaking any laws (At least in my opinion). You get a payout immediately whenever you get credit for a mined block without requiring a minimal payout and if you don't then at the very least you're contributing to the network by keeping a legitimate non-malicious node running.
A fair warning: As of June 2026 the monero blockchain is 250+GB in size, so if you want to do this consider using a 500+GB drive.
Step 1: Install and run Monerod (Monero node)
Before starting I recommend you do this in an environment as minimalistic as possible so your CPU gets used the most, I'm using a minimal Ubuntu 24.04 install with nothing but dwm installed in order to save as many resources as possible and be able to see and run the node, p2pool and xmrig at the same time, however it's 100% doable with a terminal multiplexer like tmux if you want to use even less resources.
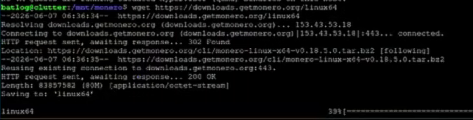
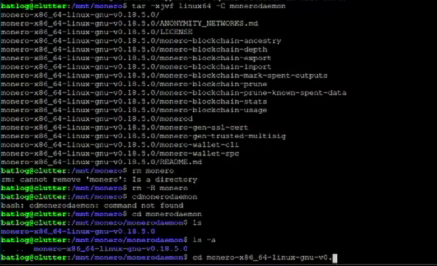
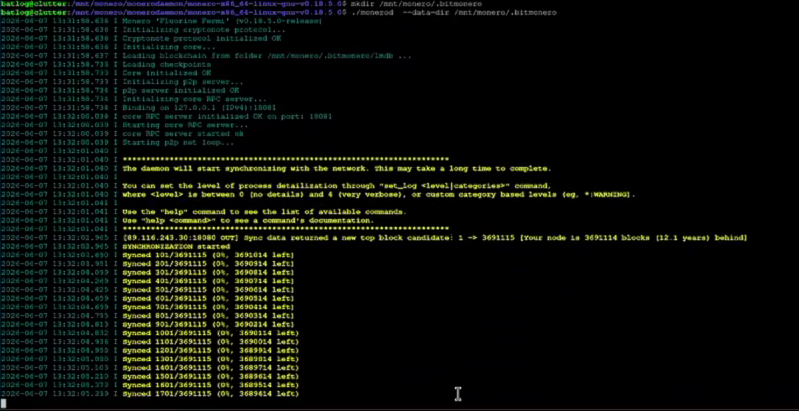
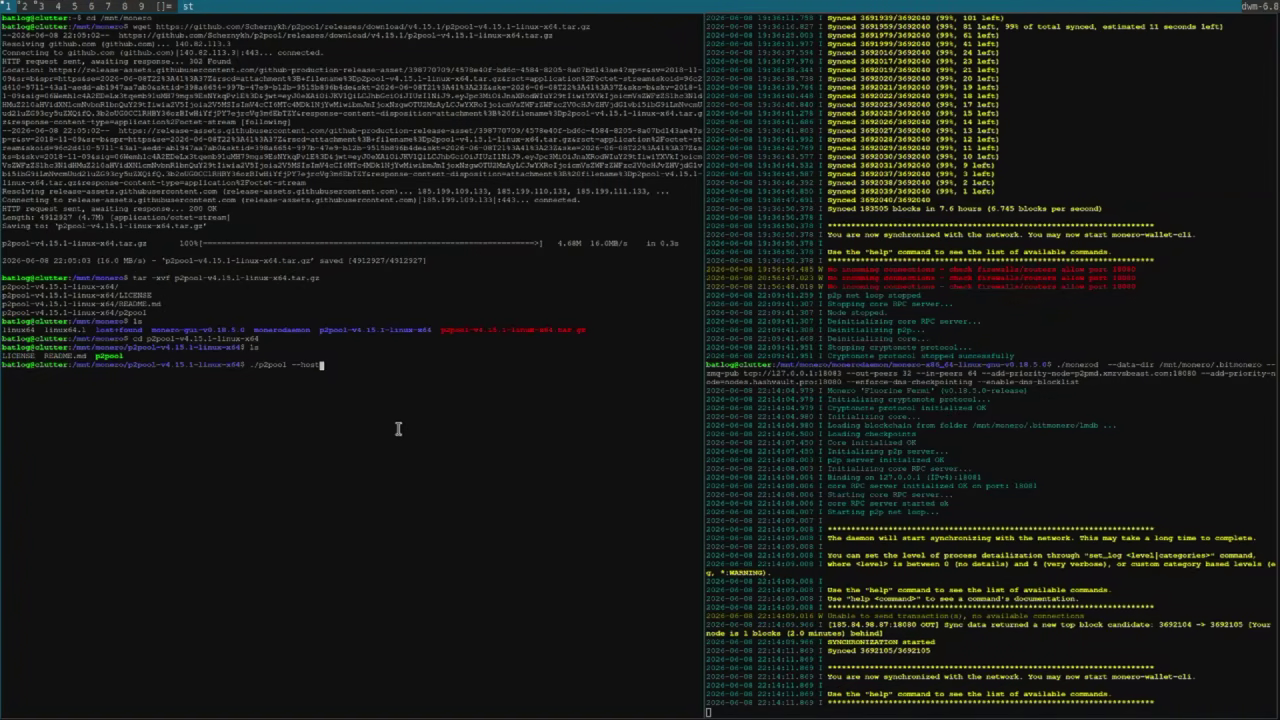
Once you get your environment all you have to do is: download the last version of monero available, extract it and run the node (Please note I'm using the --data-dir argument in order to have the blockchain downloaded to another disk).
Downloading MoneroExtracting and entering the directory where the node isRunning the monero node
Now just let the Node sync with the network, please note this may take HOURS (In my case it took a WHOLE DAY).
Update 01/JUL/2026: OPTIONAL: Run the node over TOR.
It hit me that it may be better to run this through TOR since these days doing anything with monero is more risky than it was a few years ago.
First, you want to install TOR but bear in mind you should always install TOR through their official ppa, the reason for this is because the versions in most distro repositories are several versions behind and as such lack security updates, which are critical when running a TOR server of any kind.
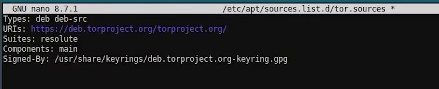
Add their PPA to sources:
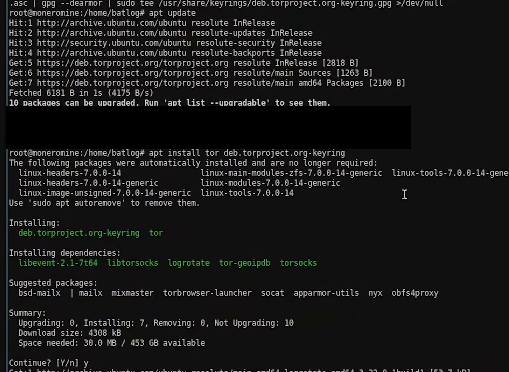
Add their gpg key (Bear in mind the long as hell string below changes every once in a while so you may need to go to their website to get it)
Update apt and install tor and the tor keyring
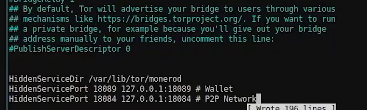
Afterwards you want to configure a hidden service in torrc, add the following lines.
/etc/tor/torrc
Afterwards, restart TOR and check on your new onion link
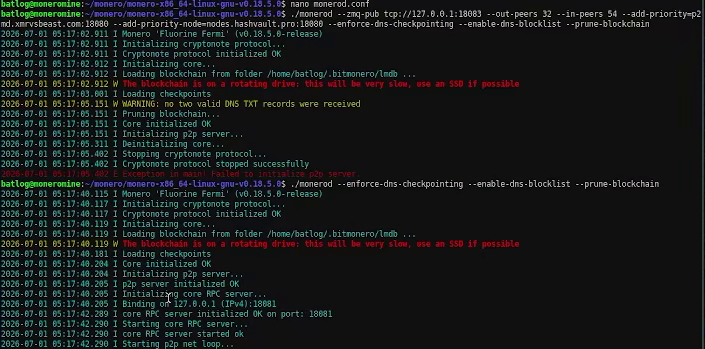
Finally, to run it on your node, add the service link to your node in the monerod.conf file where your node executable is (Create the file if it doesn't exist), then fire up the node again.
Adding tor to the nodeFiring up the node again.
Step 2: Making a Wallet
Once your node ends syncing next you'll need a wallet to use for this and ONLY for this. On P2Pool the addresses are primary, public and all users in the network can see whenever you pull Monero out of the wallet you're using so make sure to avoid using your main wallet to maintain your anonymity. On that note, ONLY MAKE A WALLET WHEN YOU'RE RUNNING YOUR OWN NODE. I'm not kidding with the whole 'malicious node' thing, even if you don't risk having your funds stolen you risk your IP and your wallet address leaking together which can lead to easy identification.
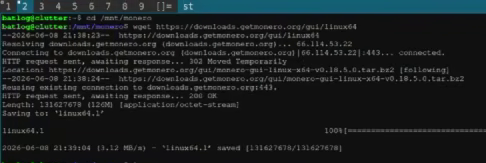
You can create a wallet using the tools you downloaded that came with the daemon but honestly I like the gui wallet, it's very intuitive and just as secure as the command line wallet, not to mention Xorg is already installed so I may as well make use of it. Just download the gui wallet and execute it (Don't execute the AppImage, that format is a bit of a PITA to run these days). You may need to resolve some dependencies.
Downloading GUI WalletExecuting the monero wallet gui
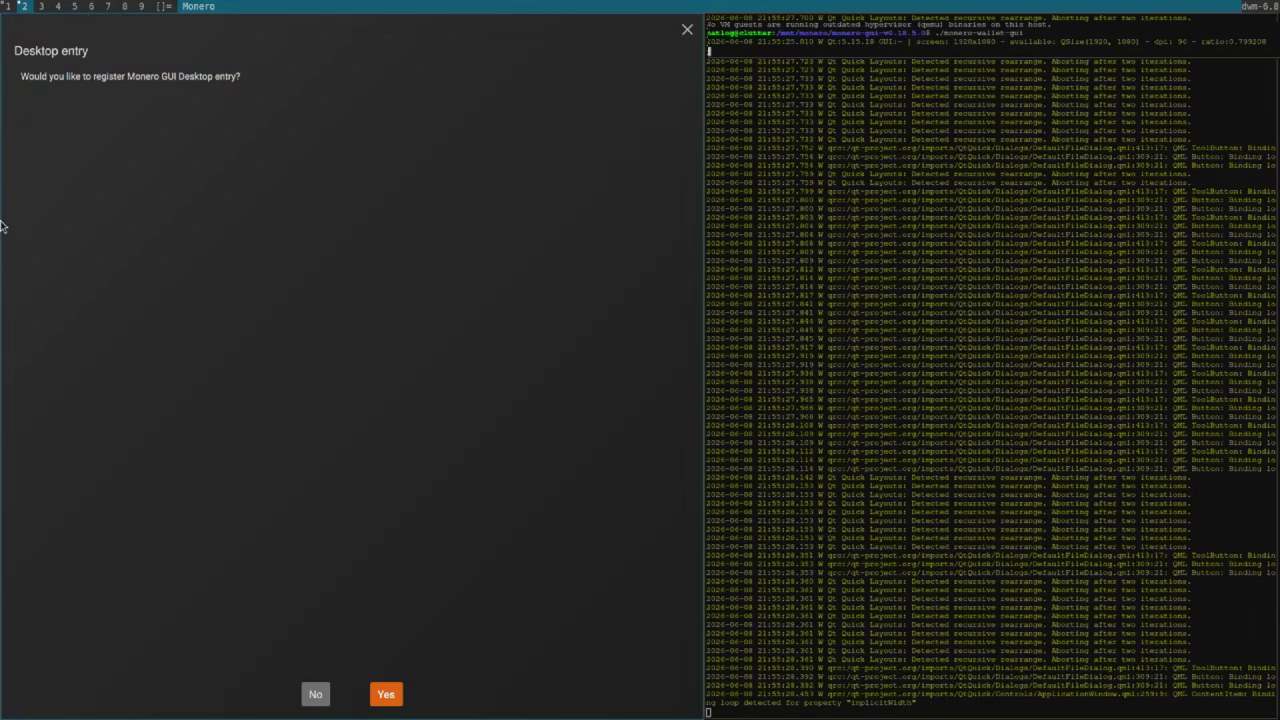
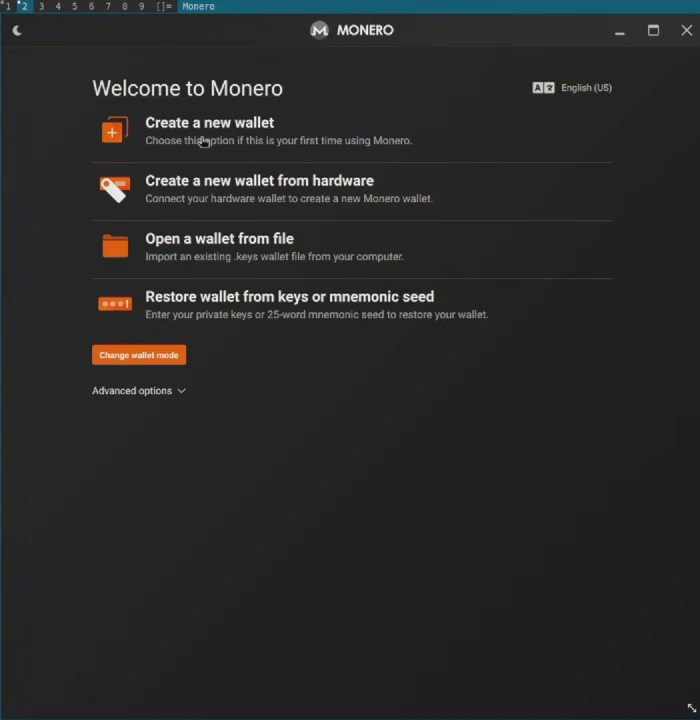
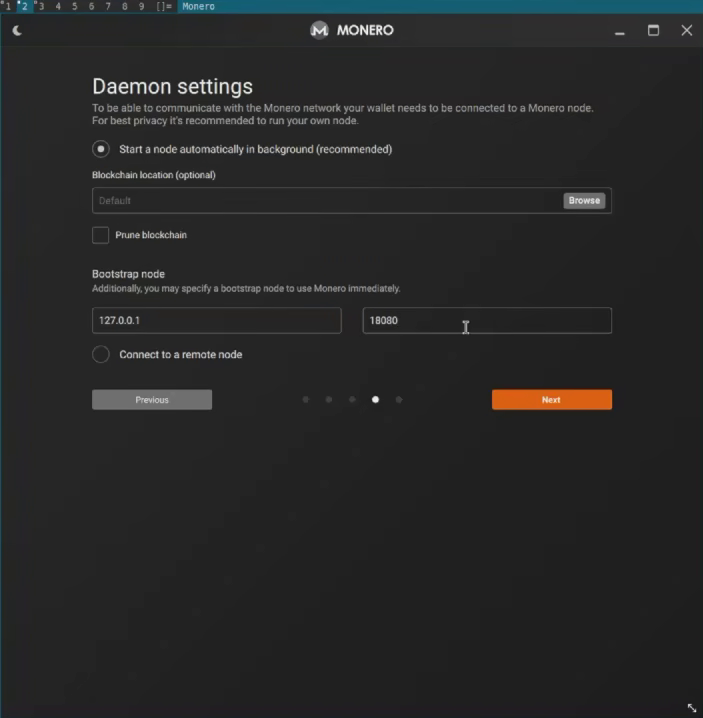
After successfully executing the wallet select create a new wallet, the process is very straight forward up until the part where it asks you to connect the wallet to a node (Daemon Settings). Fill the field below the location of the wallet with the localhost (127.0.0.1) and the port your node is currently running on (18080 by default if you didn't specify one) .
Creating a new walletSelecting the localhostrunning the node
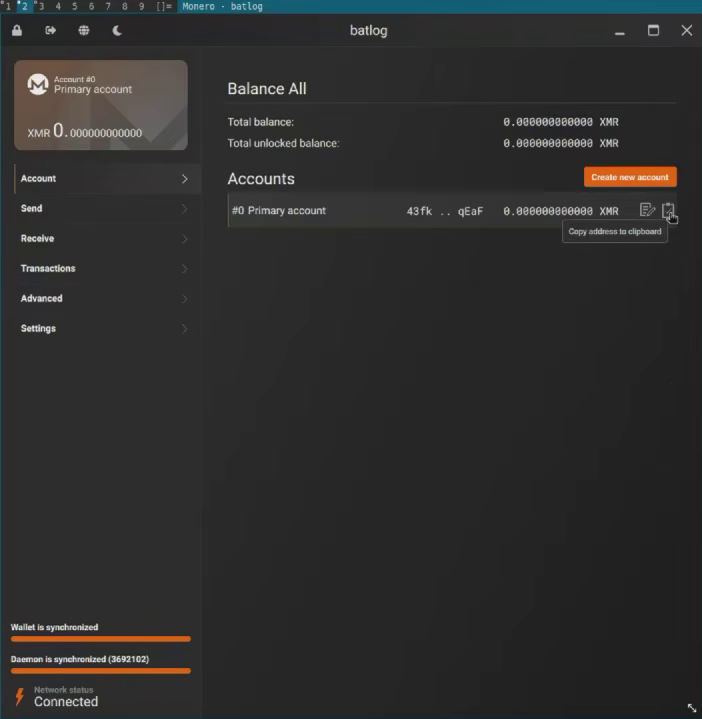
Afterwards head to account and copy the address of your primary wallet (Wallet 0). Please bear in mind no other address will work with p2pool, so don't even bother making more addresses your payouts will just be rejected.
Keep the wallet address and all information related to it safe, you can now move to the next step.
Step 3: Installing and running p2pool
Stop your node, then fire it up again with the following arguments:
While that is synchronising again I recommend you download and extract the latest release of P2Pool.
When the node finishes synchronising again, it's time to start up P2Pool, run one of the folowing commands depending on your scenario (It will connect you to different chains):
You're chad Mr fancy pants and you have a datacenter with the latest enterprise-grade CPU's at your disposal for mining.
Serious talk here don't fire p2pool without chain arguments, the ~50 top miners that use this chain are impossible to compete with and you will get no rewards.
You have a single old PC or Mini PC that you intend to run 24/7 and are just playing around because hey you gotta keep that toaster running anyways, may as well try your luck right?
Payouts are inconsistent, there are many miners but you may get a small payout weekly.
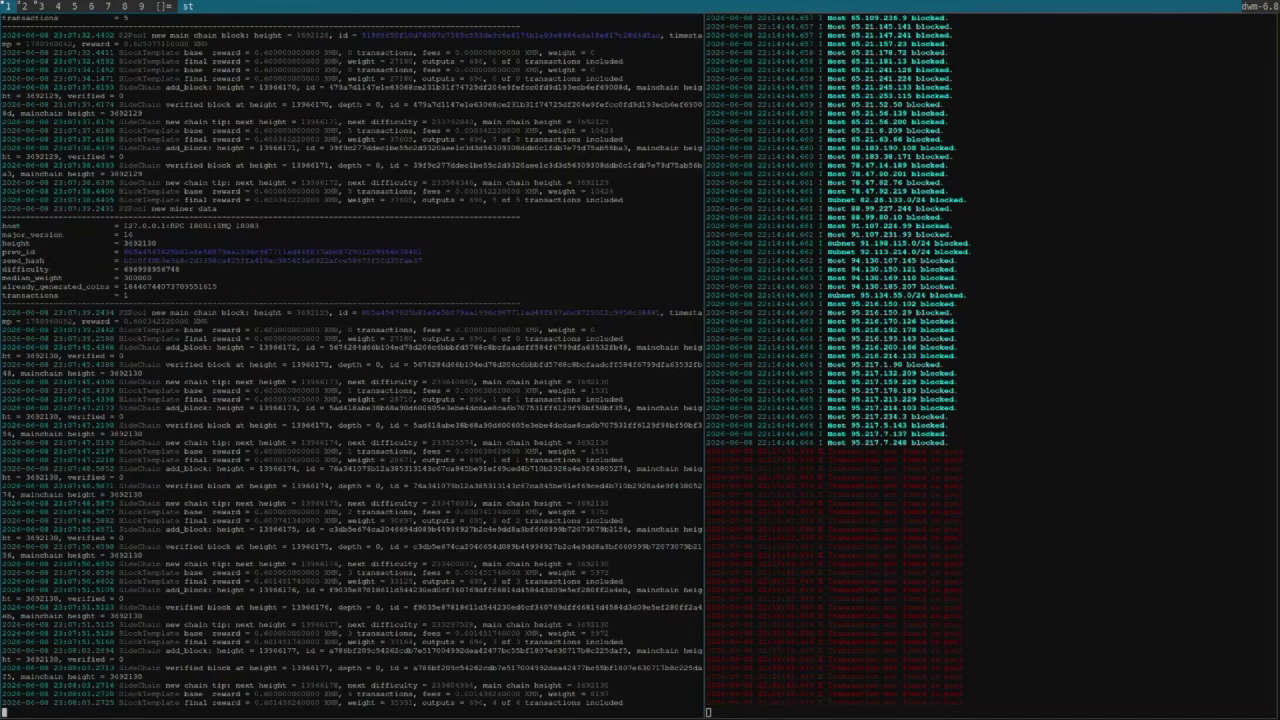
Let P2Pool synchronize (It can take a few hours again)
Never stop running the node and with both services still running proceed to the next step.
Step 4: Mine with p2pool active
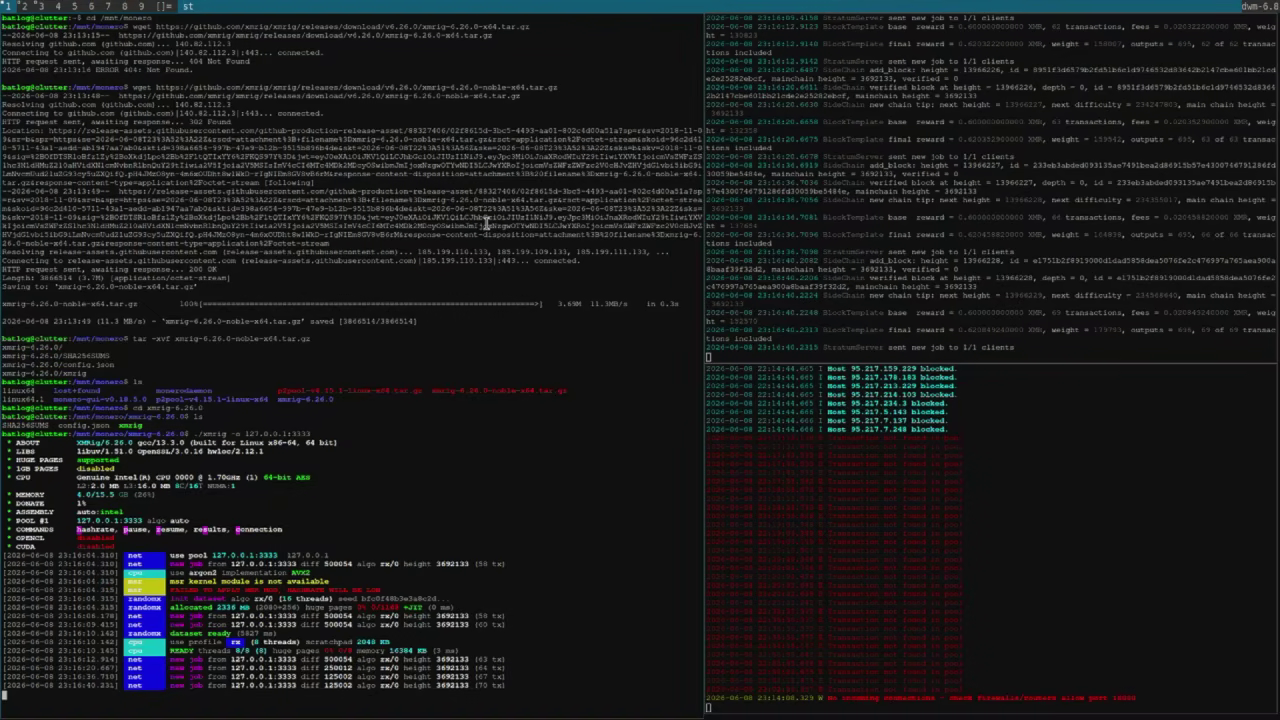
You're almost done, with the node and p2pool running download decompress and execute xmrig with the next argument: ./xmrig -o 127.0.0.1:3333 . The end result should look something like this:
Run it for a couple of hours, if you notice there's a noticeable delay between getting new jobs and accepting them (Or not getting any new jobs at all) Adjust the difficulty altering the '10000' number until you're constantly getting and accepting jobs. Also do this if you feel mining is pushing your computer too hard and it may crash.
./xmrig -u x+100000 -o 127.0.0.1:3333
You want for your system to accept jobs every 30 seconds or so, so don't be afraid to crank that number up in increments or decrements of 10,000 until you hit a sweet spot (As a general rule multiply your hashrate by about 30 and decrease the strength by 10,000 until you get a job accepted every 30 seconds or so). You may also want to run
xmrig with sudo and enable huge pages with sysctl -w vm.nr_hugepages=1280
(See the addendum of Nvidia for a better example of running this with enhancements and how to make the huge pages change more permanent)
After that's done you're done, you can now relax and leave this running in the background for hours/days/whatever, just check on it sporadically, if you earn anything it will be sent to your wallet immediately but it may take a few days to a week to clear.
Addendum 1: Running this on multiple computers in the same network for a bigger hash rate
I think this is rather obvious but in order to run this on multiple computers all you have to do is start p2pool with the same wallet address on all computers you're using to mine, this will let the network know your hashrate is the combined result of all your computers instead of just one.
You can also setup xmrig and point it to the address of your p2pool side-chain, even remotely (This is how I believe the miners on the main p2pool chain have achieved their insane hashrates by hijacking computers and just pointing in the direction of a server they pay for, you can see an example on the Nvidia addendum).
Addendum 2: Don't use a mechanical hard drive
This didn't register with my dumbass the second time I did this and I spent an entire day synchronizing my node again. Basically since the price of SSD's is terrible at the moment I'm trying to save the ones I have and using HDD's where I can, but that was a mistake for this particular project.
Under normal circumstances mining monero on a mechanical hard drive has very little impact in performance, however this changes when you have to mine while running your node, the system struggles to keep up with the blockchain while also managing the OS and everything else, causing you to lose performance or even worse, to stutter.
Use an SSD, even if it's a cheap one.
Addendum 3: Running Xmrig Cuda-plugin on Linux
I legitimately couldn't find information on this anywhere online and that's because under normal circumstances this is kind of dumb? Monero uses RandomX for the main algorithm and it uses threads in order to mine, which for a GPU means a single thread and therefore you're kind of wasting electricity for very little payoff. However as I have shown in other articles I have an RTX 1000 which only pulls 50w from the socket so it's not that big of a deal and it is better than running a second smaller PC for me.
I'll take it slower than usual and step-by-step due to the lack of info on this subject.
Here are a few things to know:
You need a 6GB+ VRAM GPU, I tested this both on my Tesla P40 and my RTX 1000 and in both it went a bit over 4GB of VRAM while mining. Oddly enough it never went over 5GB on either card, so I'd recommend looking for a 6GB+ card that's very power efficient rather than powerful like my T1000. The P40 pulled 150W if you're curious.
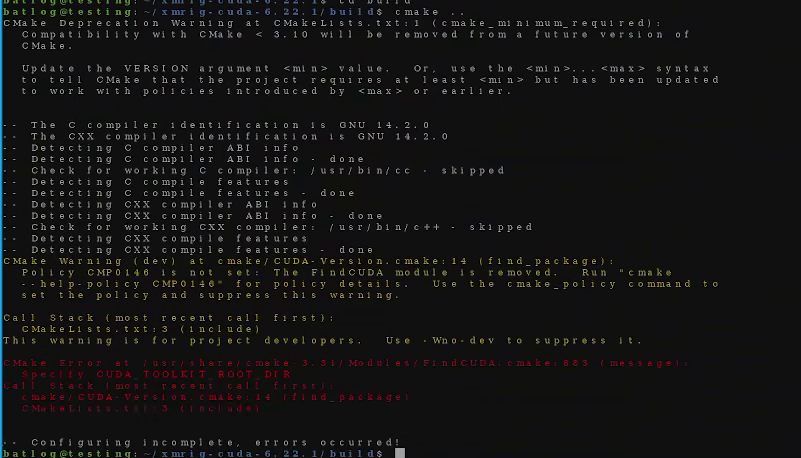
You NEED to install a Cuda toolkit from Nvidia with a version lower than 12.9, otherwise this will not work, I believe this is due to the devs of Monero abandoning this plugin a year ago. You can mix-and-match a Nvidia Toolkit version and a different driver version (This addendum is indeed an example of that), you only need the Nvidia toolkit in order to compile the plugin since the devs of Xmrig don't compile binaries in order to avoid people filling pull requests and because unlike their main miner they don't really profit from it. See an example of what happens if you install a driver without a toolkit below.
Use Ubuntu Noble (Or a version of Linux Mint derived from it like I did, I used version 22.3), This is optional but Debian Trixie kept failing me when trying to mix-and-match drivers, I ended up resorting to Mint which handled everything without a fuss.
Example of compilation failure if you have the Nvidia drivers installed but you didn't previously install the toolkit
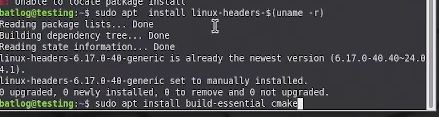
First you need to install the dependencies, honestly there aren't that many, you just need the linux headers, build-essential and cmake.
Installing dependencies
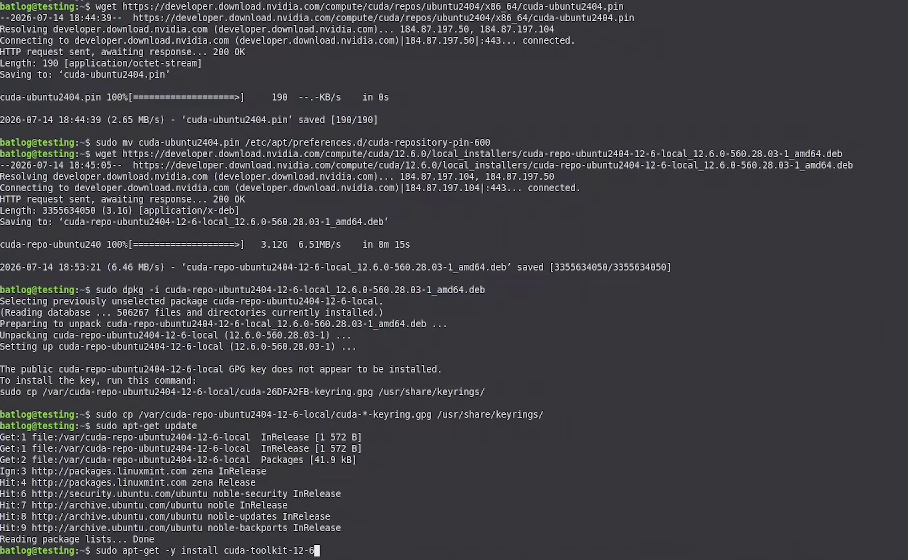
After that's done you need to install the CUDA Toolkit according to Nvidia's website, the toolkit that worked flawlessly for me was 12.6 (Version 12.9 gave me the above toolkit error), this toolkit worked for both my Tesla P40 and my T1000. Here are the commands by Nvidia to install it on Ubuntu 24.04:
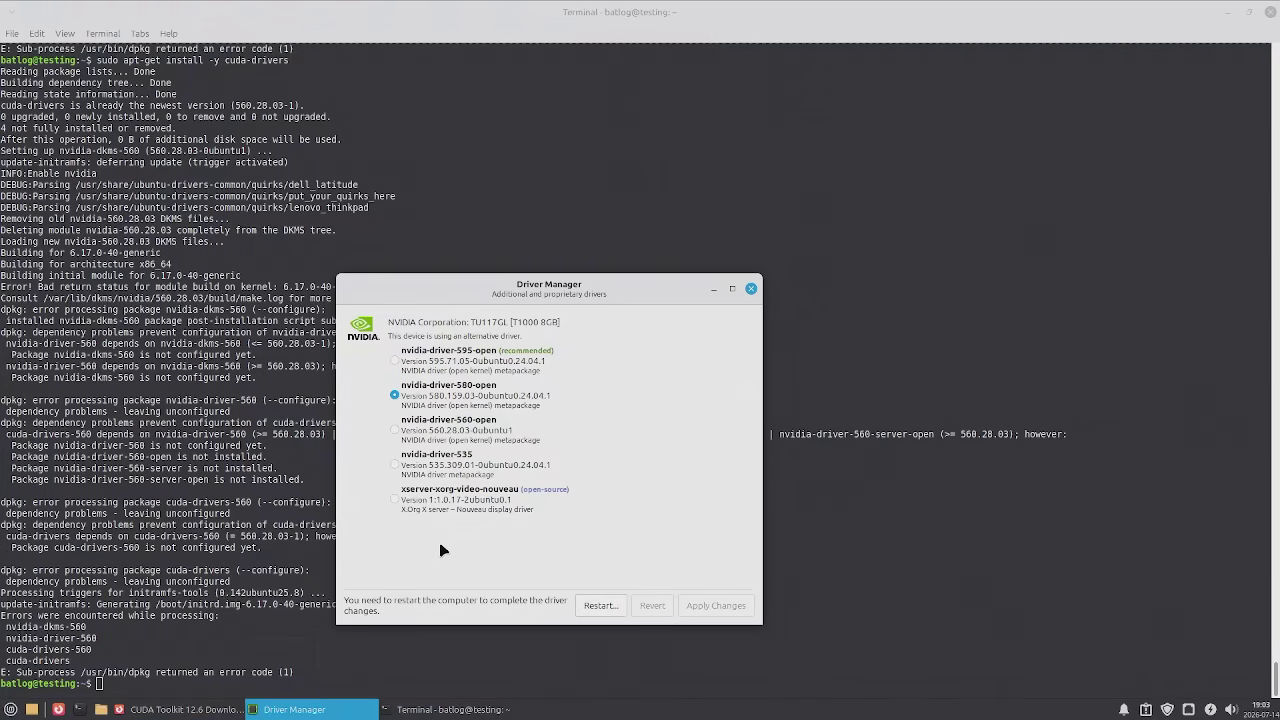
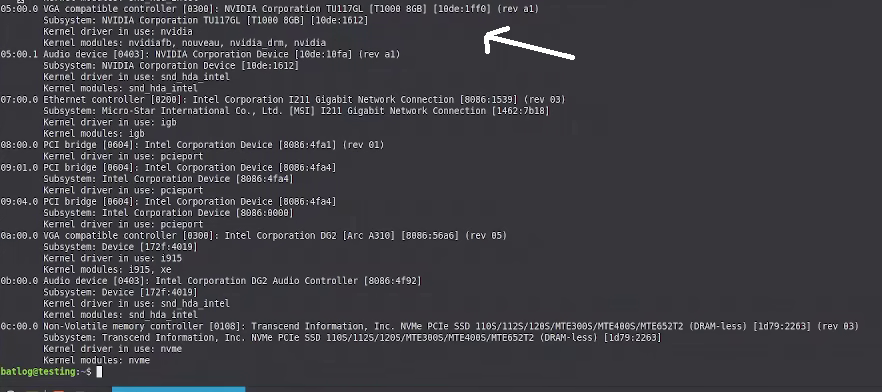
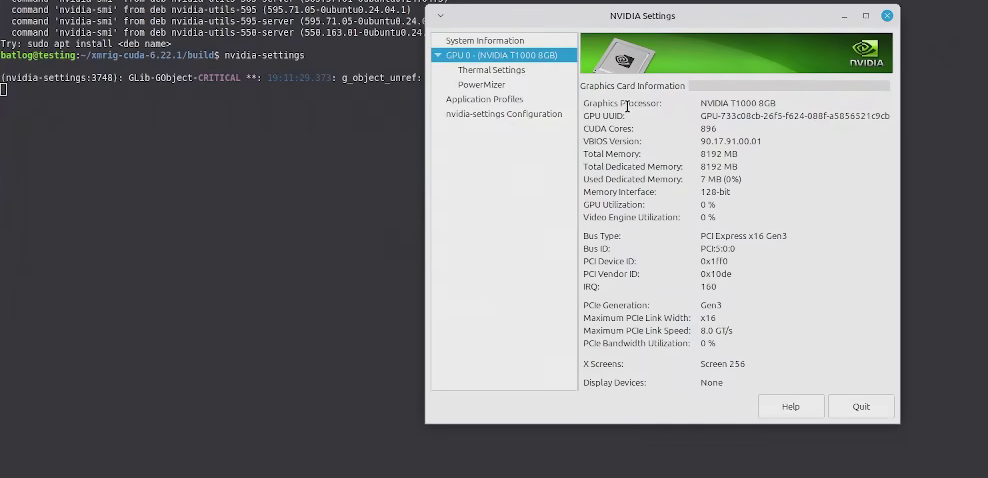
Once you're done you have to install an nvidia driver, for my P40 the 560 drivers worked flawlessly but my T1000 rejected them, forcing me to mix-and match using the Mint driver manager (Below you can see the failed installation of the 560 drivers and success at installing the 580 open drivers). Afterwards, just reboot and verify the nvidia driver is installed and in use using lspci -knn and nvidia-settings.
Installing the Nvidia driver via Linux Mint's driver utilityNvidia Kernel in useNvidia-settings displays the correct info
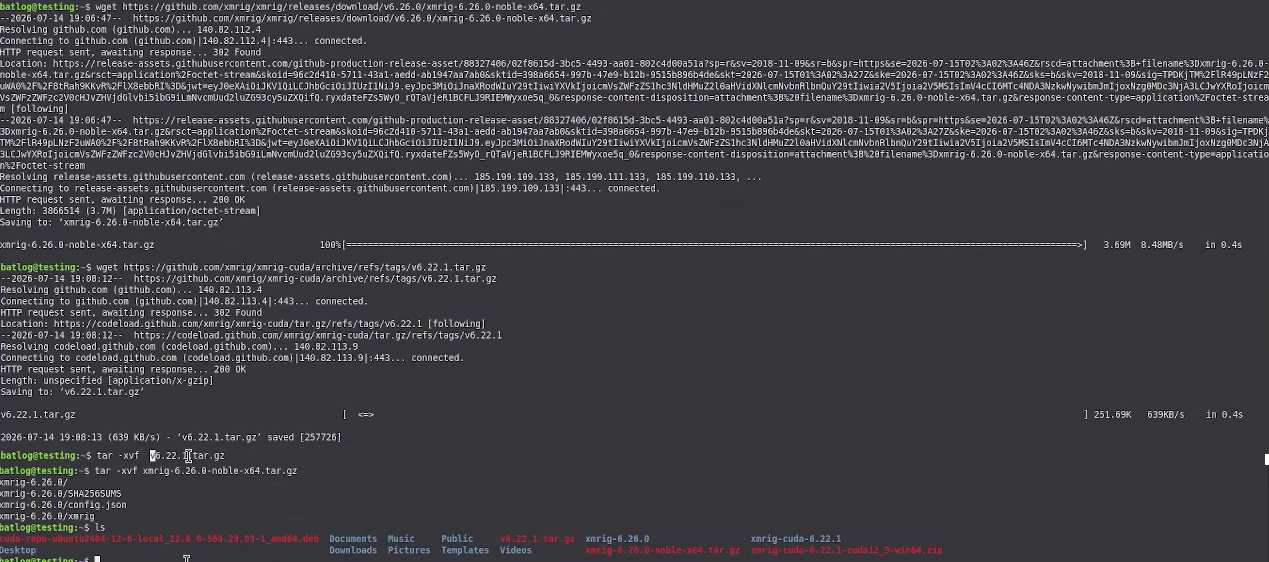
Once this is done, download and extract the latest versions of Xmrig and the Cuda plugin.
Downloading and extracting XMrig and the Plugin
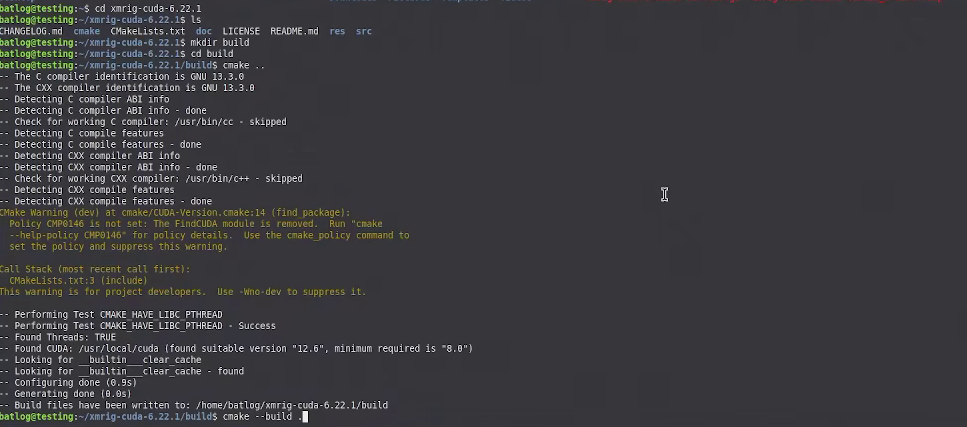
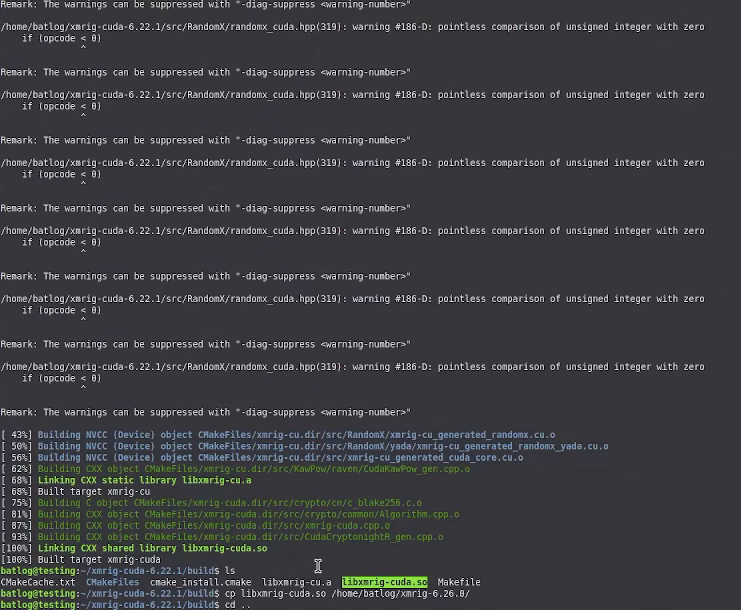
Afterwards open the cuda directory and make a directory called 'build', open it. Run cmake .. and if you don't get any errors run 'cmake --build .' DO NOT USE 'make', it will fail and do mind the dot in the build command. You may get a lot of warnings on both parts of the process but as long as you don't get an error and you get an executable called 'libxmrig-cuda.so' then there are no problems. Move the executable to the xmrig folder.
Running the cmake commands for compilationExecutable compiled and moved to the xmrig folder, do note the many warnings.
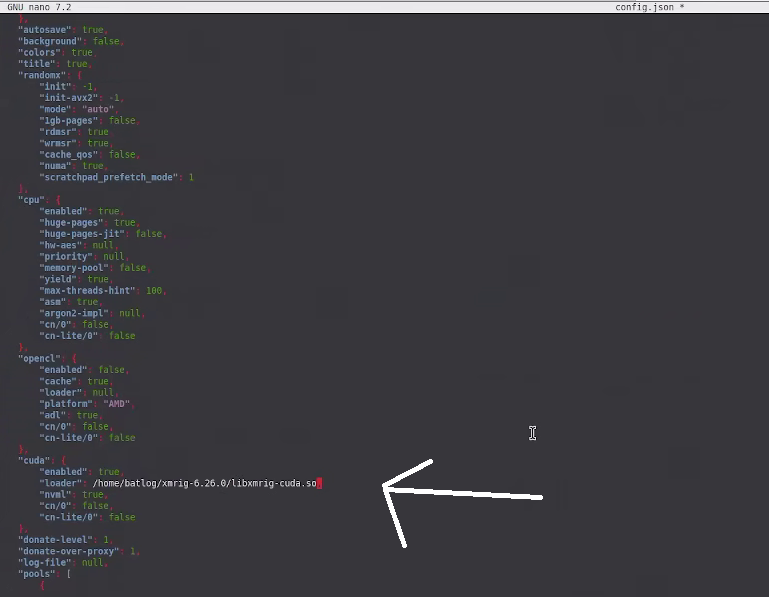
Afterwards move to the xmrig folder, you'll only find 3 aside from the cuda plugin here files here, the executable, a shasum and a config file, open up the config file in any text editor and change the cuda value to 'true' and the path of the cuda plugin (It must be the full path and don't leave it like 'null', it works fine if you leave it as 'null' on windows but it always failed me on Linux).
Editing config.json and changing the values to true and the path to the cuda plugin executable
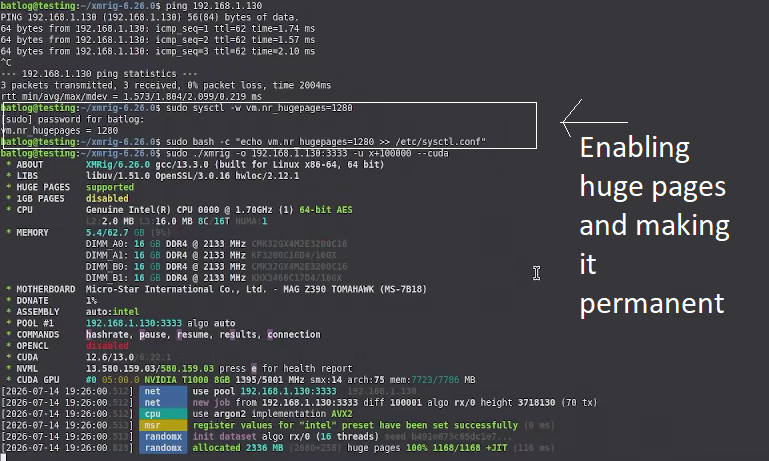
Afterwards all that's left is running xmrig, remember to enable huge pages and running it as sudo if possible, this is optional but it does have huge performance boosts. In this example I connected to the p2pool node on my intranet which was 192.168.1.130 on the port 3333. Remember to add the --cuda flag, otherwise xmrig will ignore it.
Enabling huge pages, running xmrig with the cuda flag
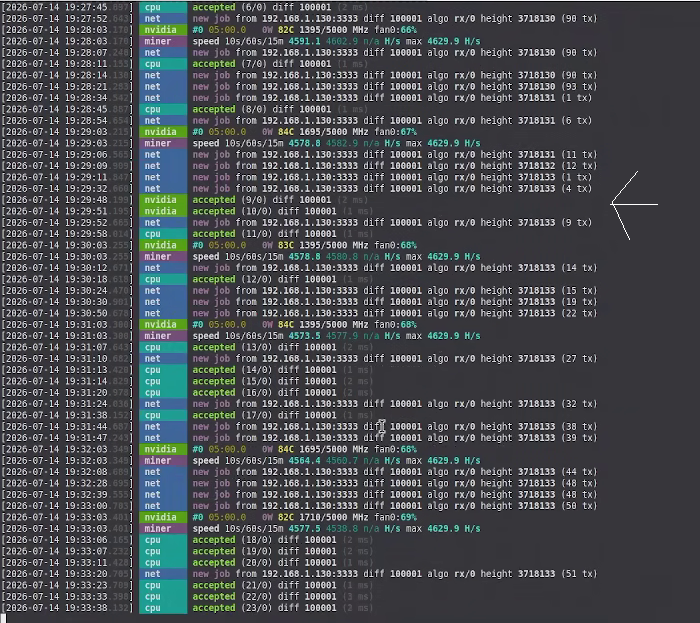
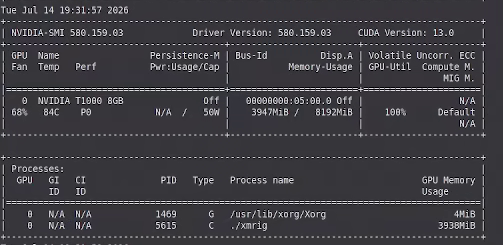
Afterwards it all comes down to monitoring, check if CUDA does send some shares every once in a while and I also like to run nvidia-smi -l 1 on a different terminal to check if the GPU is being used. Don't mind the power not being shown below, that's just a quirk of the T1000 but it cannot go over 50w anyways.
GPU accepting jobsnvidia-smi reporting that CUDA is actually being used to mine